
Windows 10 is the most feature-rich operating system nowadays especially Windows 10 Pro and its big brothers (Windows 10 Enterprise and Windows 10 Education). On top of the other fancy things, the introduction of the ‘Windows Sandbox’ environment makes Windows 10 prouder in itself. Previously, the sandbox environment in Windows 10 could only be created using third-party tools but when you’re getting an integrated tool, it is potentially becoming a lot easier and safer than the alternatives. In this article, we are actually going to Set up Windows Sandbox through all the step-by-step details that help you can create your own Sandbox environment.
What is Windows Sandbox?
Windows Sandbox is a temporary virtual desktop environment. While Windows Sandbox is running, you’re essentially running a clean version of your operating system in which your activities do not affect the rest of your machine.

The Windows Sandbox is a secure environment where you can test any software before installing it on your main device. When you close the sandbox, it destroys any activity before returning to the host machine.
Can We Run Windows Sandbox?
Windows Sandbox is not available in Windows 10 Home, as we said in Windows 10 Home Vs Windows 10 Pro article. It is currently available for Windows 10 Pro, Windows 10 Enterprise, and Windows 10 Education. To run Windows Sandbox properly you need to have:
- A 64-bit processor
- Virtualization switched on in your system BIOS
- 4GB RAM minimum (Microsoft recommends 8GB)
- At least 1GB free disk space (Microsoft recommends using an SSD)
- At least 2 CPU cores (Microsoft recommends four cores with hyper-threading)
How to Enable Virtualization?
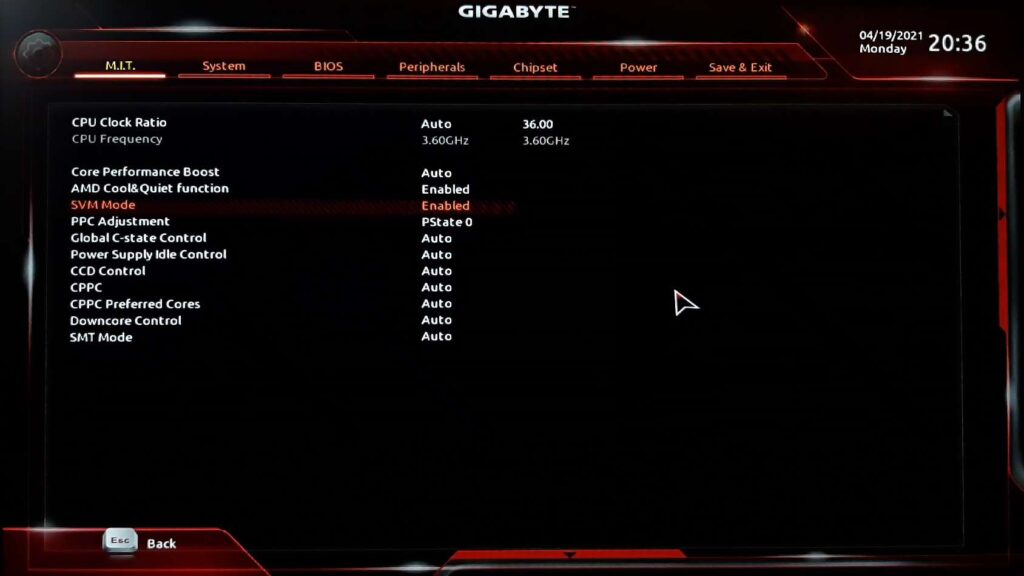
First of all, to set up the Hyper-V, we need to enable ‘Virtualization’ from BIOS. Every BIOS or UEFI is different and also there are other different names of ‘Virtualization’ that are listed. We are using Gigabyte Motherboard which they have named ‘SVM Mode’. So look for ‘Intel VT-x’, ‘Intel VT-d’, or anything on similar lines. If you can’t find anything then google something like this: “How to Enable ‘Virtualization’ on ‘Your Motherboard Manufacturer’?”
To enter into the BIOS, in our case, we have to hit the ‘Del’ key a couple of times and when the motherboard manufacturer logo appears on the boot screen, enter into the ‘MIT’ tab, select ‘Advanced Frequency Settings’. Select ‘Advanced CPU Core Settings’ > ‘SVM Mode’ (Virtualization Technology). Hit Enter to set it to enable. Now press the F10 key to save and exit.
How to Switch on Windows Sandbox?
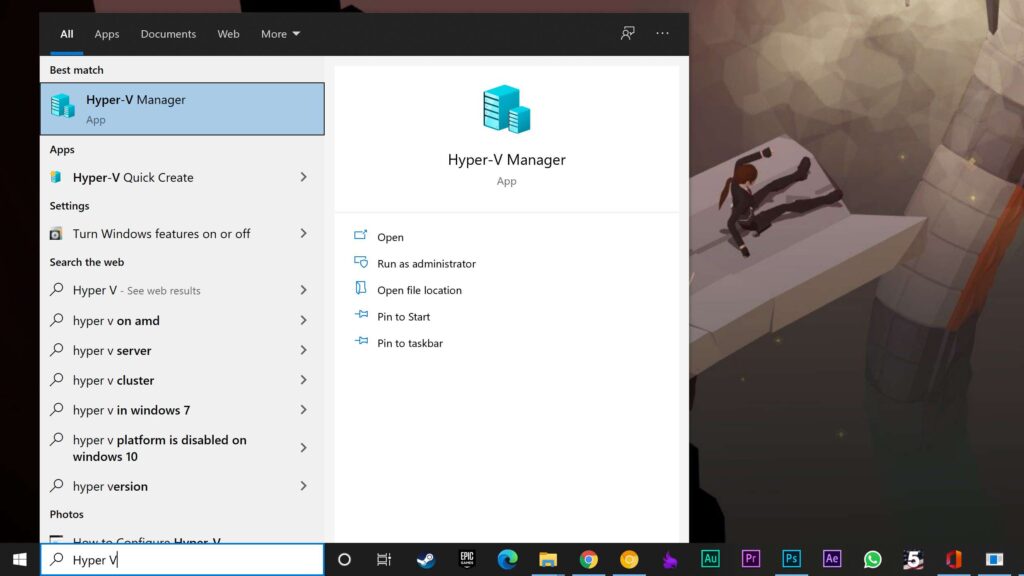
To create Windows Sandbox, you have better check Microsoft Hyper-V is up and running. Here is the information about How to Activate Hyper-V in Windows 10? When Hyper-V is active, you can switch on the Windows Sandbox.
So, after activating the virtualization & after the successful reboot you have attempted, Windows boots up. Now press ‘Windows key + R’ on your keyboard. Now the ‘Run’ window appears. Type ‘optionalfeatures.exe’ and hit Enter. Scroll down and check Hyper-V. It will check the nested options automatically.
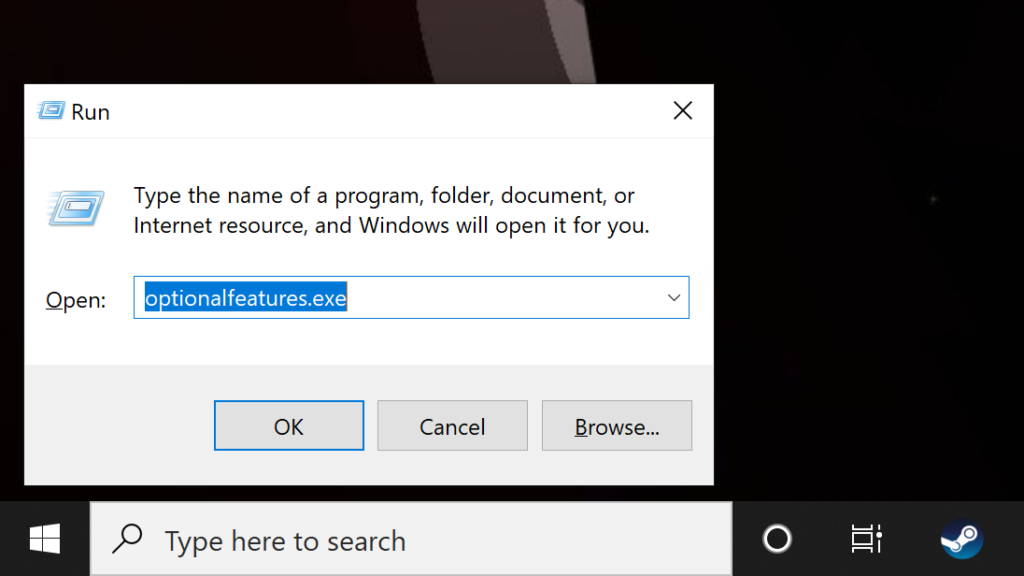
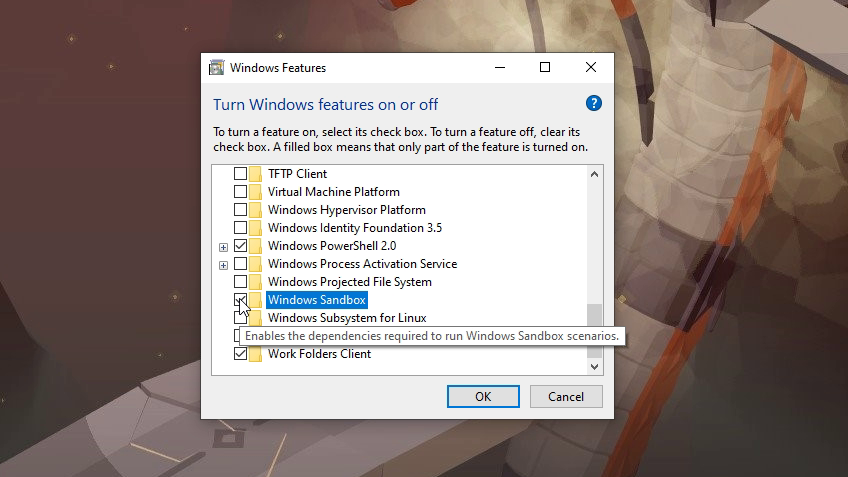
Now, scroll down a little more and find the ‘Windows Sandbox’ option and check the box. Hit ‘OK’. It then installs some necessary packages and asks for a restart. Then you do restart your system and that’s it.
How to Access Windows Sandbox?
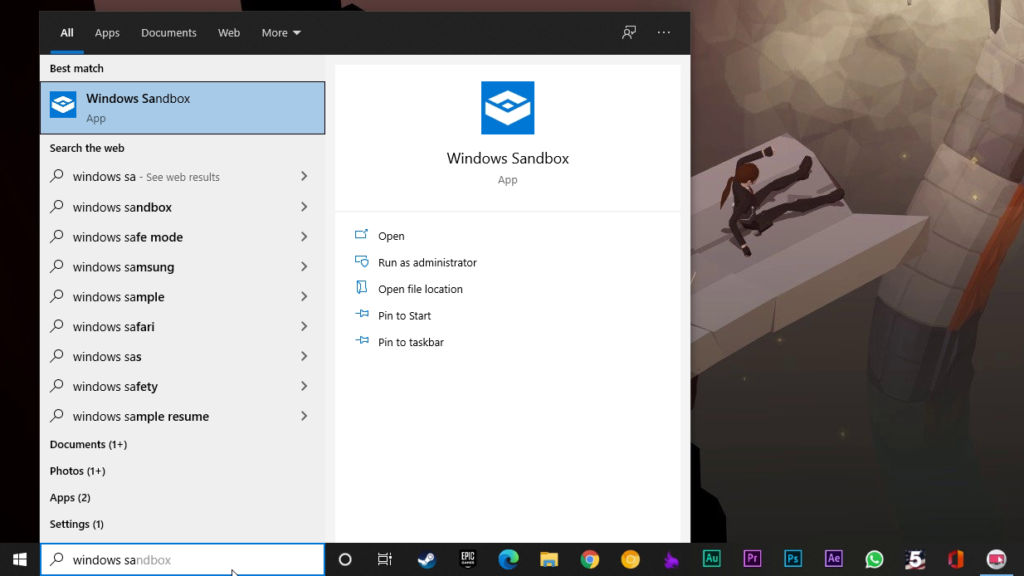
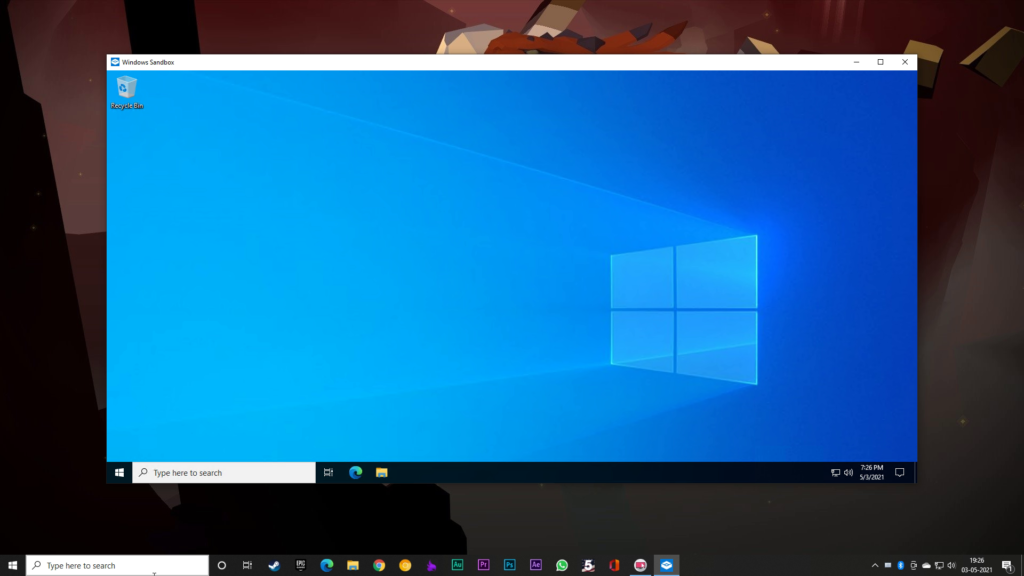
After Windows restarts, just search it on the Start Menu’s search bar: ‘Windows Sandbox’. The first option is our concerned one. Click on it.
There you have it. You have a clean and isolated version of the current Windows. Which also always stays up to date with the same system updates as the host.
When you’re done with the Window Sandbox and close the application, any changes you have made will disappear permanently from the system running in the Windows Sandbox.
Windows Sandbox: Give It a Try!
So, if your system possesses the ability, why don’t you use this awesome feature called Windows Sandbox? It is a really cool feature that came with Windows 10 May 2019 update and nowadays, it is filling many people’s needs. This is not an only Sandbox environment as there are several third-party Sandbox tools available. Some of them are free whereas some are paid but you don’t need them if you have Windows 10 Pro installed, if not then check them out.