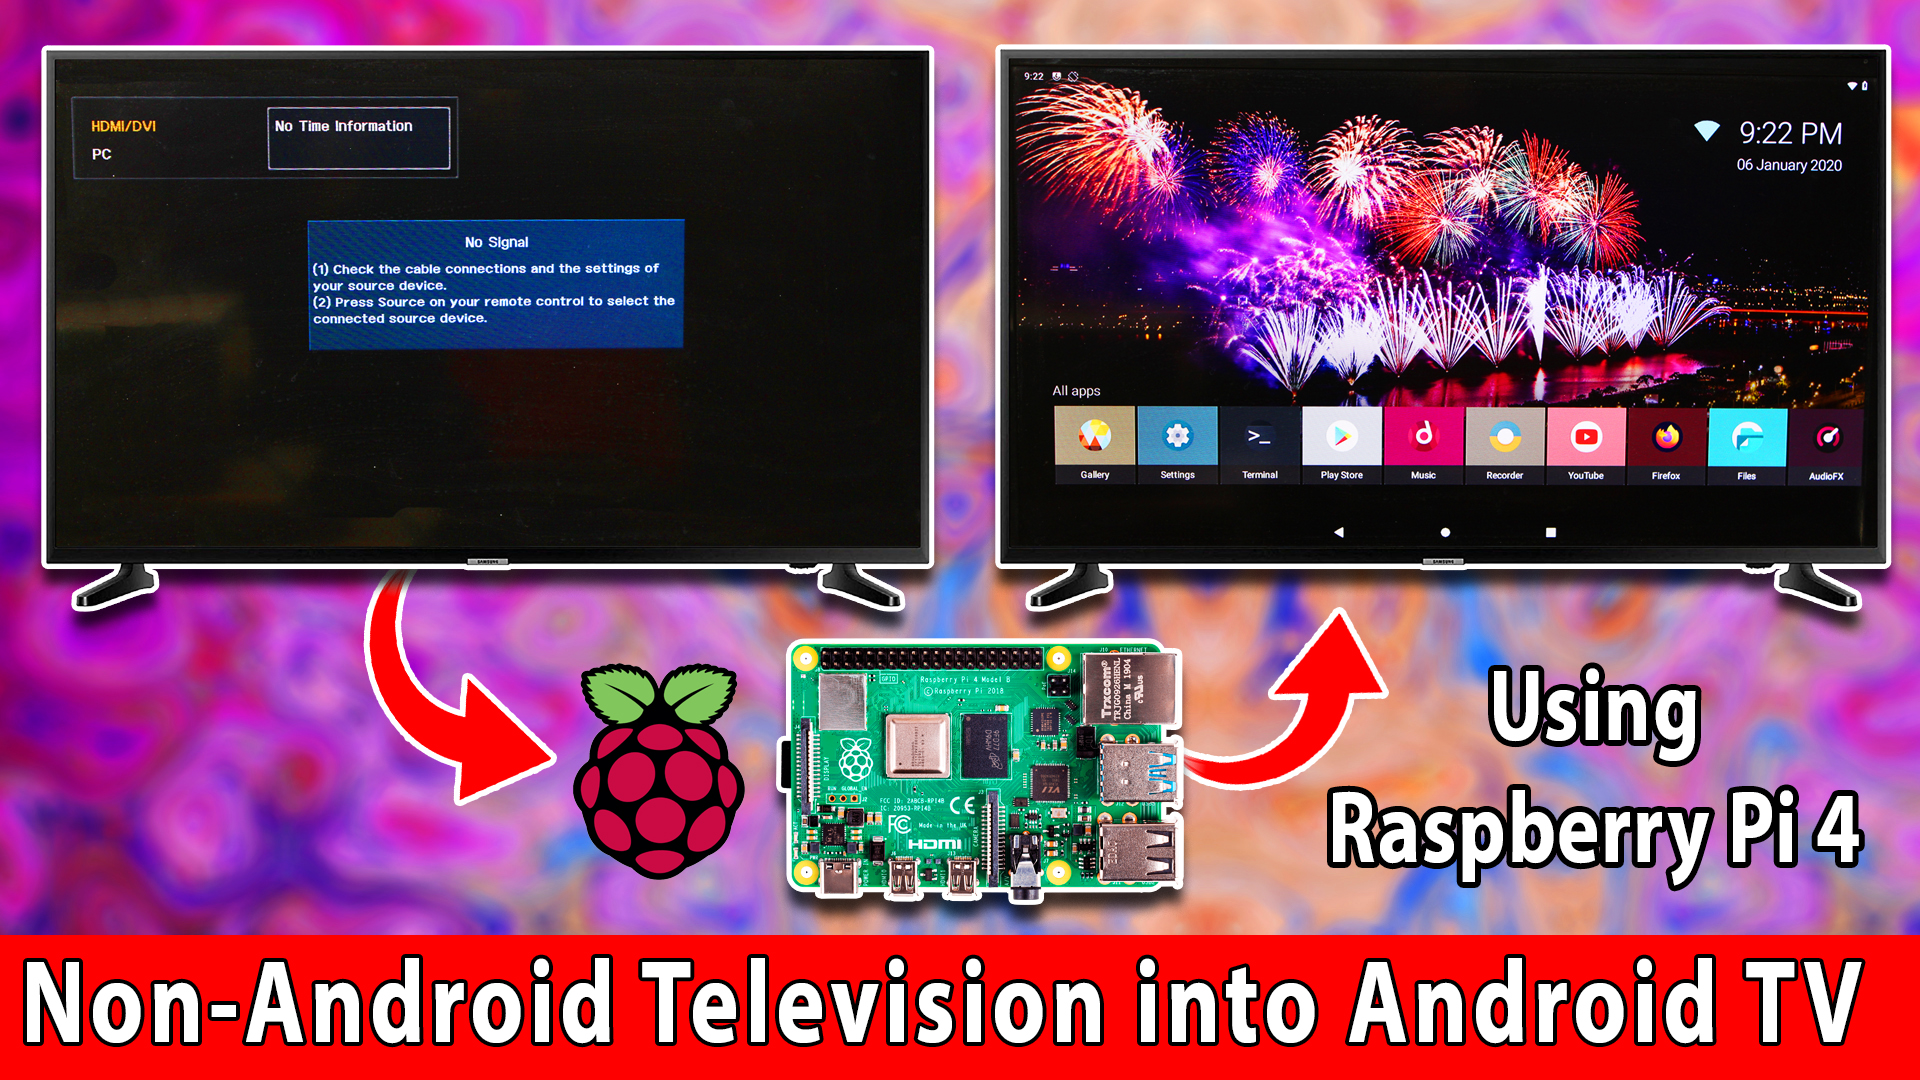
Android TV’s are pretty common nowadays. Everyone likes this but when it comes to buying a new Android TV then they realize that it is not pretty cheap and also buying a new one makes that TV a total waste. To get rid of this problem we can easily use an Android TV box though it offers almost all the facilities that a real Android TV should have. But they are not so pocket-friendly too and cheaper alternatives are not so reliable and sometimes many features are missing on them. Now a question arrives; can we make our own Android TV box? The answer is yes, we can! Using single-board computers, it is pretty easy to do.
Introduction of a Single Board Computer
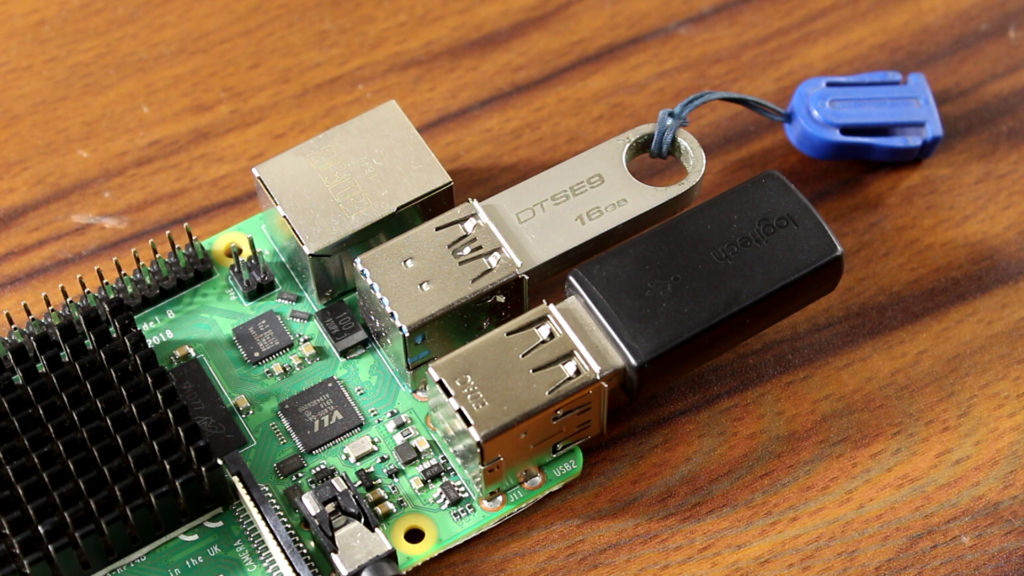
For this project, I just go with Raspberry Pi 4b which is the latest version and a successor of raspberry pi 3b+. According to its specifications, it is more powerful than its predecessor. Because of that, before doing anything we have to add a heatsink over its system on the chip. And also, I have used a fan to cool the heatsink down.
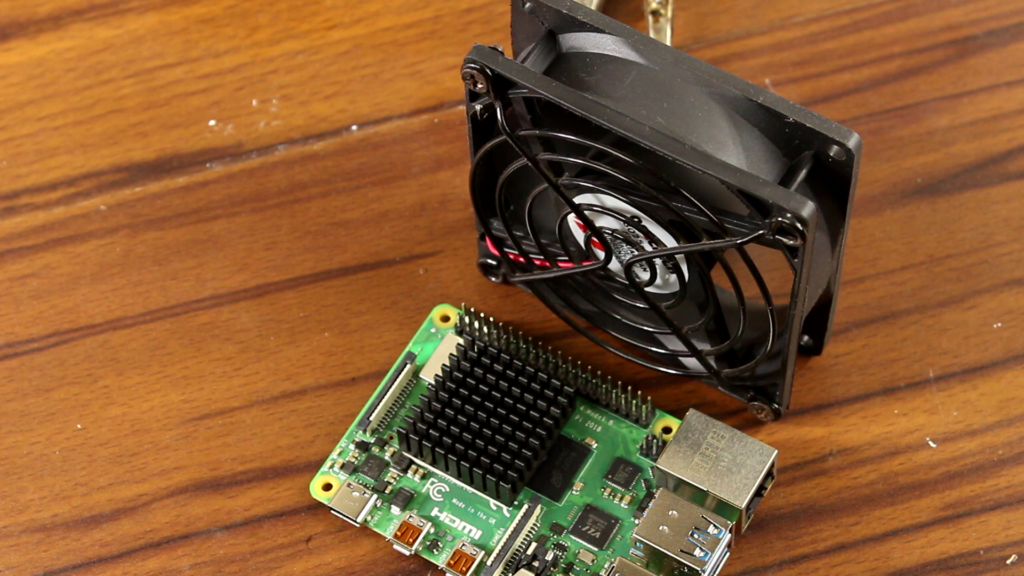
It is important to say that the Raspberry Pi 4B what I have right now is the 4GB RAM variant. This project can be possible in the 2GB RAM variant also. Now you may think I have set this gigantic heatsink with the pie. It could short the pie because it is bigger than SOC. No, it will not, why? I will explain later. Although if you’re not experienced in this field then I recommend you to use the preoperatory heatsink of Raspberry Pie 4.

Watch the Video Below:
If you are recreating this project then watch the video first to understand everything correctly. If you have already watched that video and then come to the post, I am grateful to you.
What You Need:
There are several software and hardware components you need to build this project, Here is the list what we need:
- Raspberry Pi 4b
- MicroSD Card
- Keyboard & Mouse
- Raspberry Pi Case (Optional)
- Android Image
- GAPPS
- Recovery2Boot
How to Install Android?
For starters, we need a 16GB microSD card. Which I firstly formatted into its standard settings by using SD Card Formatter.

Then I downloaded LineageOS 16.0 from the developer’s website which is based on Android 9.0. Afterward, I unzip it and get the file. Then I used balenaEtcher to flash the image file onto the SD card.
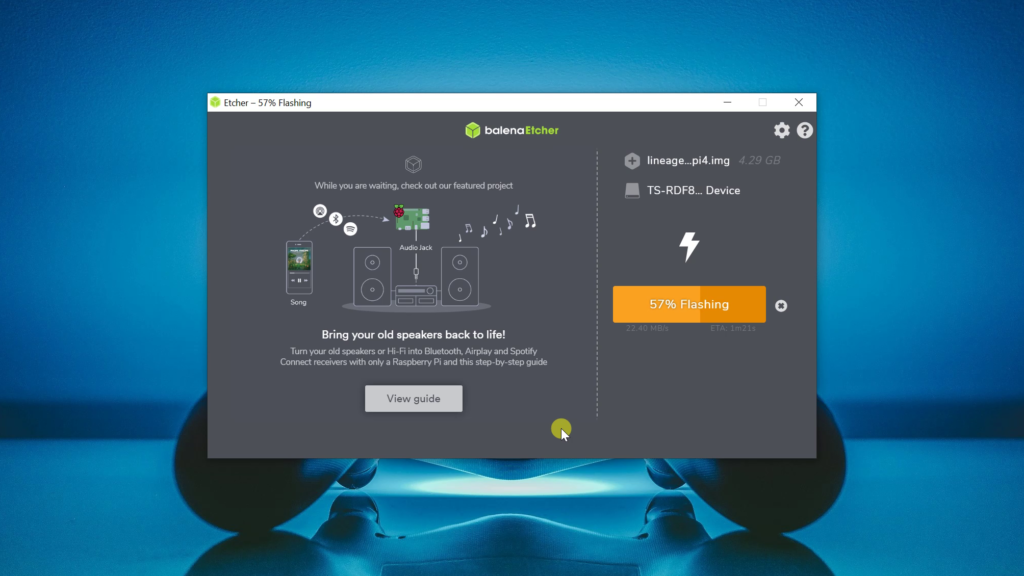
When the flashing is successfully completed, I insert the microSD card into the pi. For the display, I used the micro HDMI to HDMI cable, that micro HDMI goes to the pi and the HDMI goes to the television.
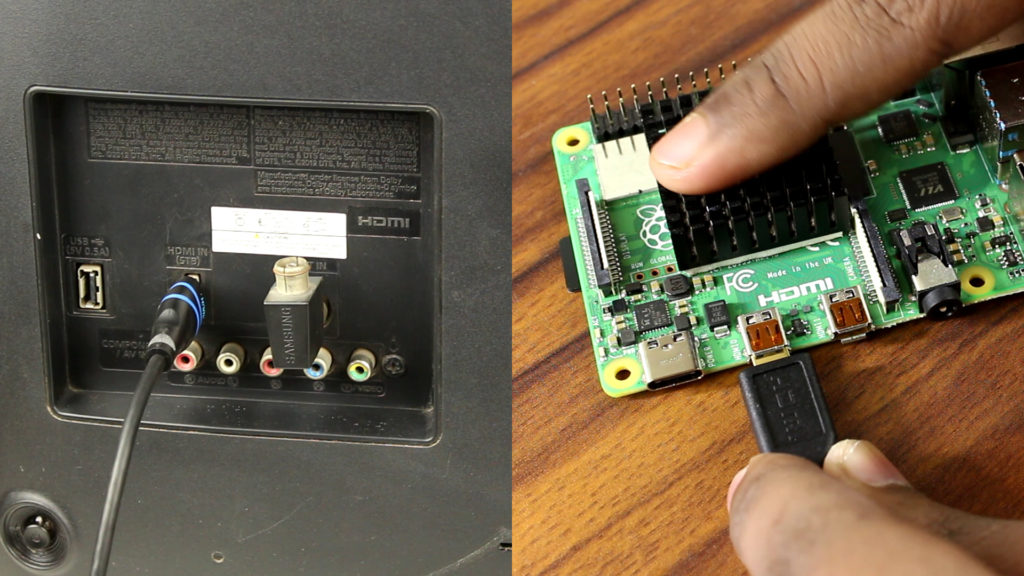
For the power, I use USB type C cable and a 5V 2amp power adapter to power the pi. Although it is recommended to use a 5V 3AMP supply. Currently, I don’t have any so I stick with 5V 2A one.

Remember if you have faced any problems regarding 5V 2A power supply then use 5V 3A one. if you also don’t have this like me then you can use the breakout pins of the pi to supply the power.
Also, I used a wireless keyboard and mouse for the inputs. After switching on the power both these lights start blinking.

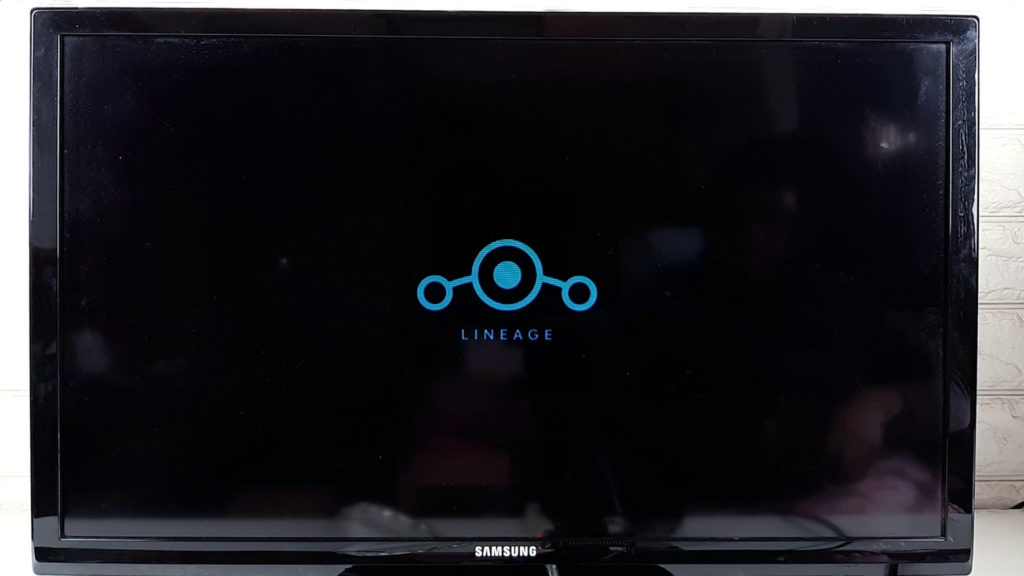
On the TV, as you can see lineage OS is booting.
When everything has been completed. We jump up into this screen.

After completing all the setup process, we came into this screen.
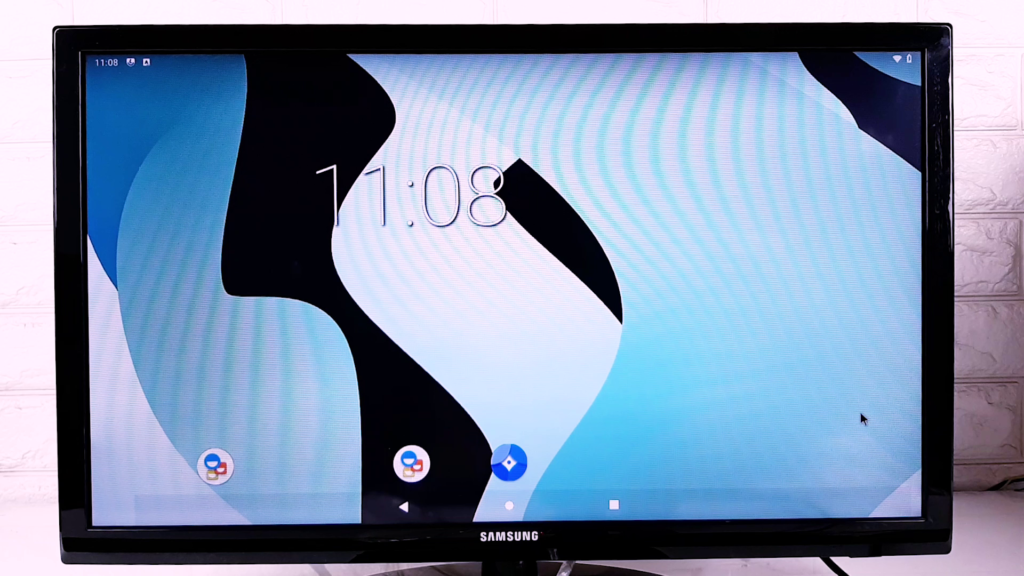
Ok, as you can see the android is successfully installed. Right now, Android 9.0 is running. Now we have to install Pico GAPPS on the pi to get the Google Service which is recommended by the developer also. It includes Google Package Installer, Google Play Services, Google Text-to-Speech, and Google Sounds.
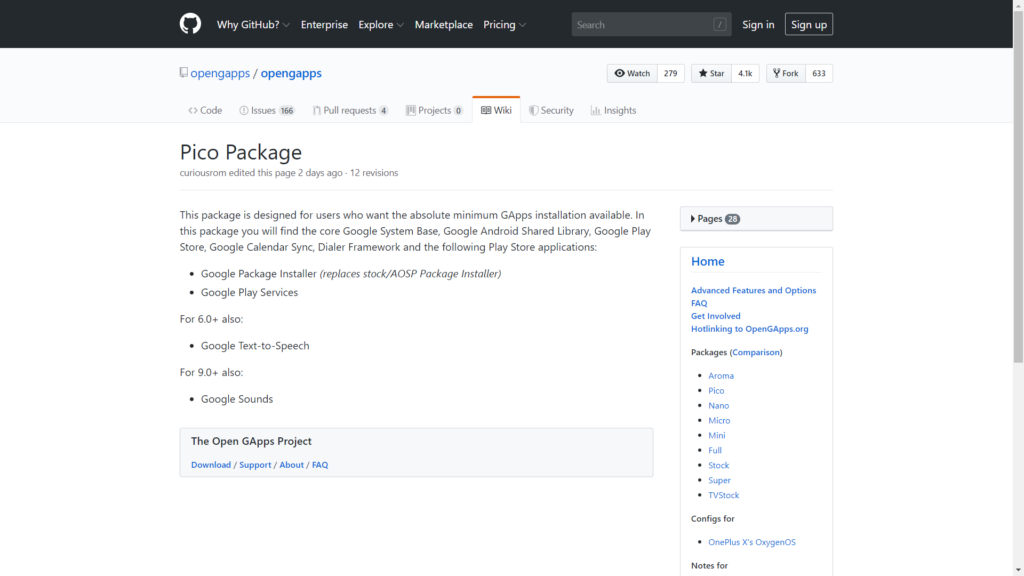
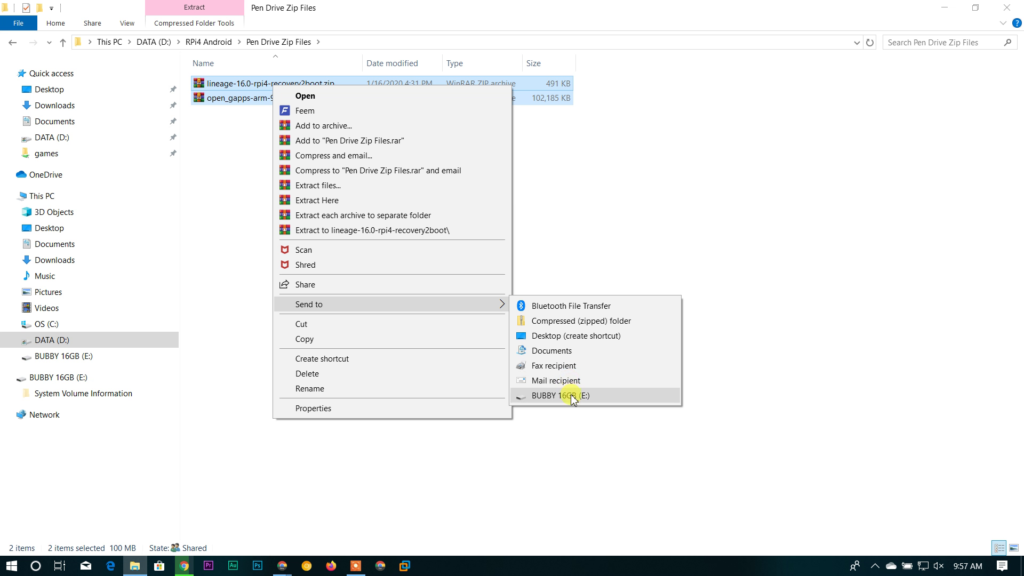
Anyway, I copy the GAPPS package file into a different pen drive. Now we need another zip file called recovery2boot. What it will do, you can understand later in this post. Continue Reading…
Now let’s come to the pi. Go to the settings > about and then tap the build number seven times that enable the developer option.

Now let’s move on to the developer option and turn on the root access by clicking on “root access” and select Apps and ADB.

Afterward, turn the local terminal on from the developer option too.

I have also inserted the pen drive into the USB port of the raspberry pi where I copied those zip files.
Next, in the Terminal I write these three commands one by one
- su (That determines the SuperUser)
- rpi4-recovery.sh (Helps to get into the recovery mode)
- reboot
Then the raspberry pi automatically boots into the TWRP recovery. Now install the GAPPS from the USB-OTG. I am not going to explain this here step by step if you need then watch the above video.
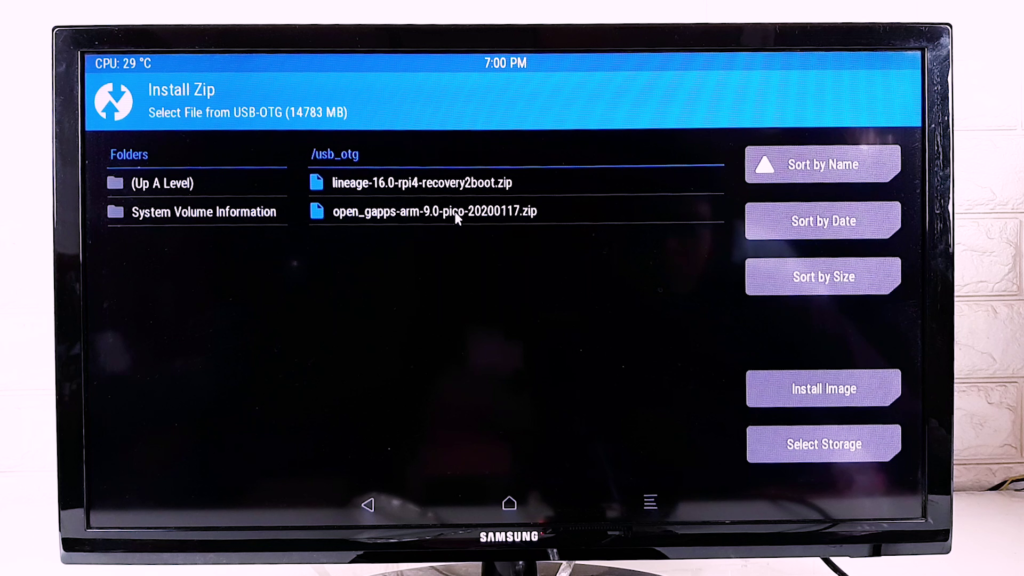
After installing GAPPS, perform ‘factory reset’ from the recovery

Next, flash the recovery2boot to get out of the recovery.

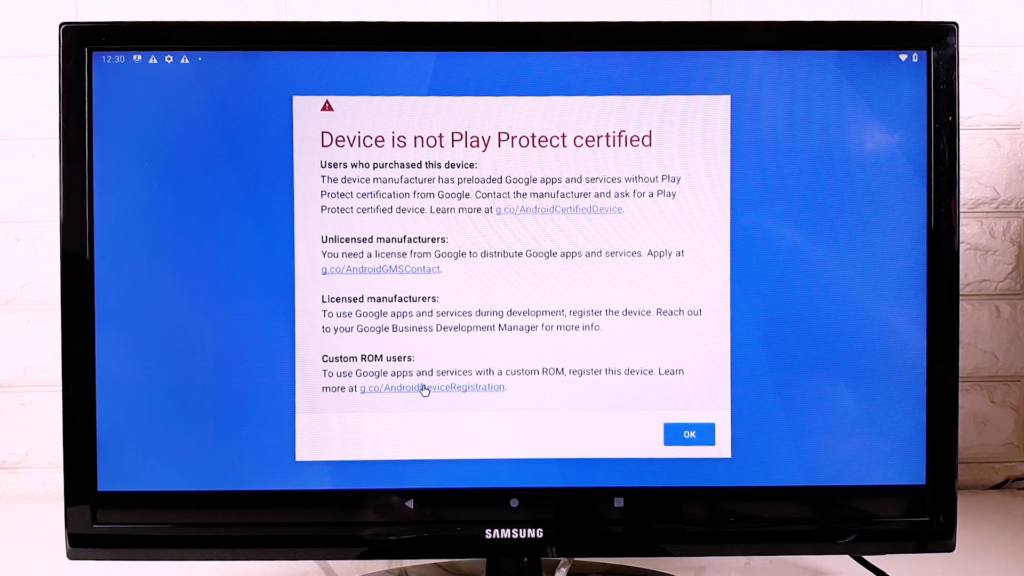
Then the OS takes a bit of time to boot. When this is successful, we will go through all the setup procedure of an android system that everyone knows. During this process, error messages come into our screen regarding device registration.
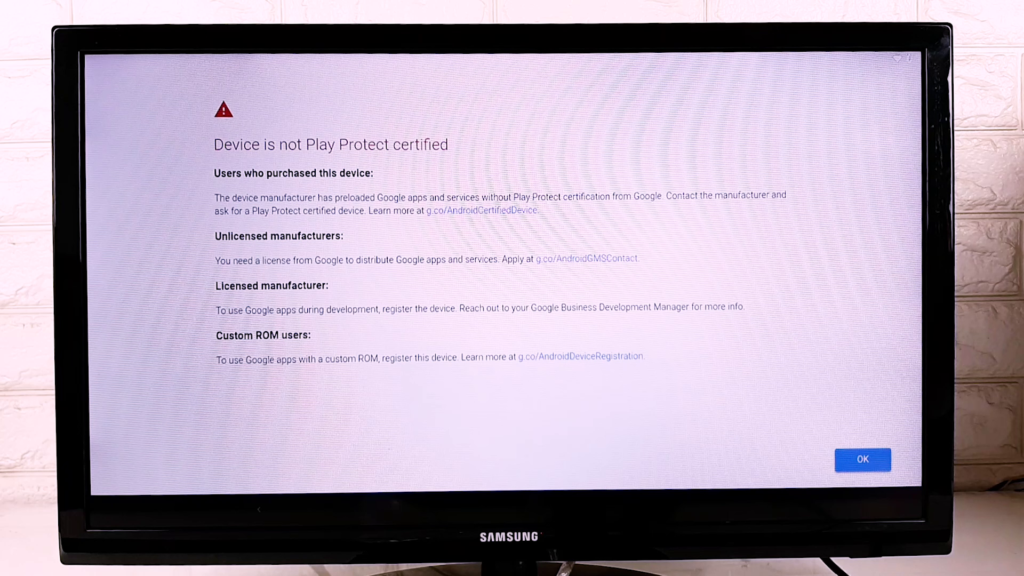
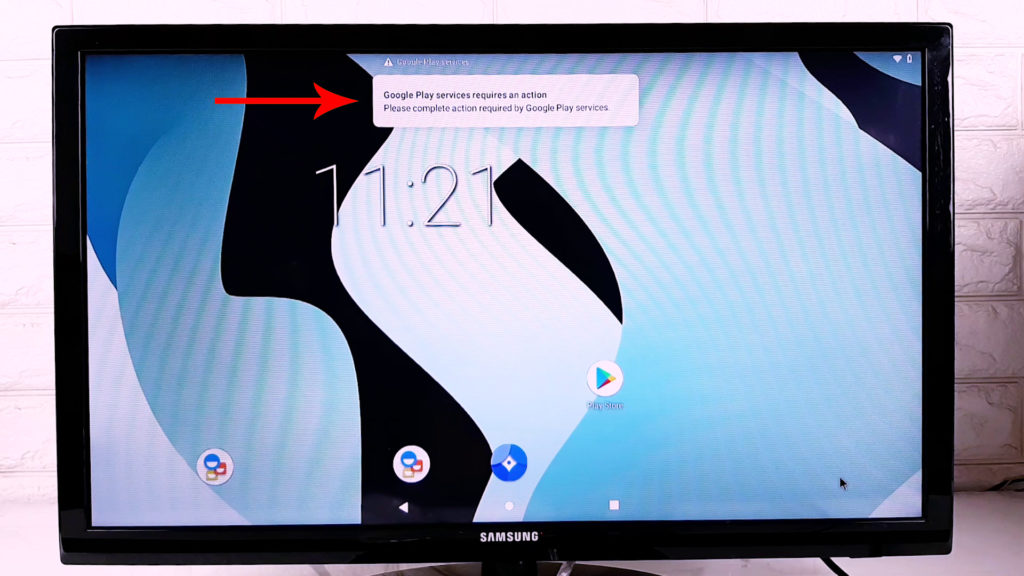
Just ignore them for now, we will solve it later. When the setup procedure is completed, you’ll notice that the interface on LineageOS on your Raspberry Pi basically looks like Android, not Android TV. I will fix that later. First, I have to solve the google play services issue as it constantly provides notifications.
How to Solve Google Play Services issue on Raspberry Pie?
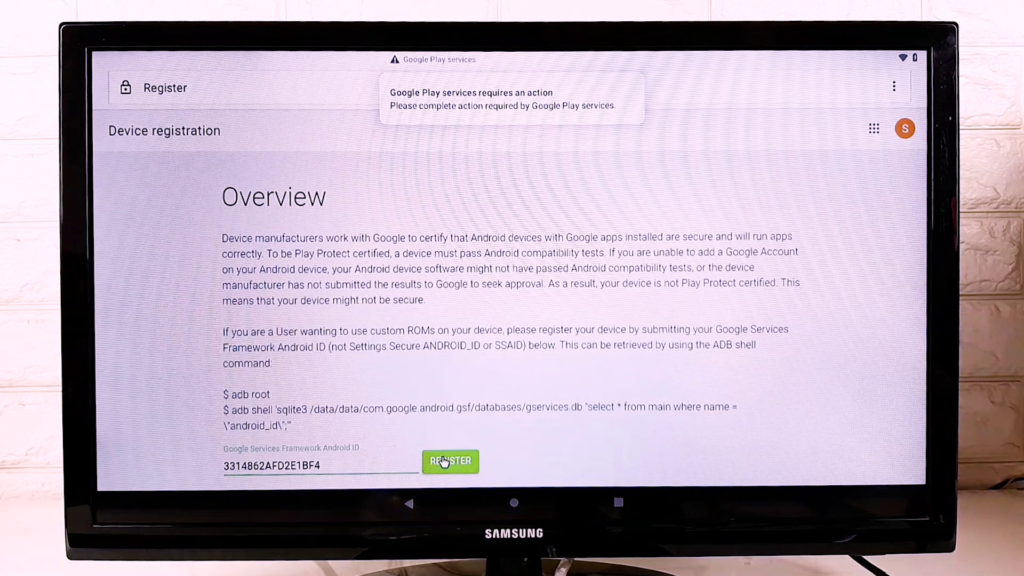
To get rid of this problem, download an application called device ID Download it and install it. Next, open the application. Here we get the “Google Services Framework” Code. Click on it and then click the copy button on this dialogue box. We need this ID later.

Ok, click on the play store’s error message from the notification panel.

It automatically redirects us into this window. In this window click on this link.
This link will redirect us to this device registration page. You need to sign in with your Google account. I have done it already so I don’t need to do that. Now paste the “Google Services Framework ID” by pressing the Ctrl+V on your keyboard and click on register.
After a minute or two, the process will be completed. To confirm this, scroll down a bit on this web page and you get a number like this.
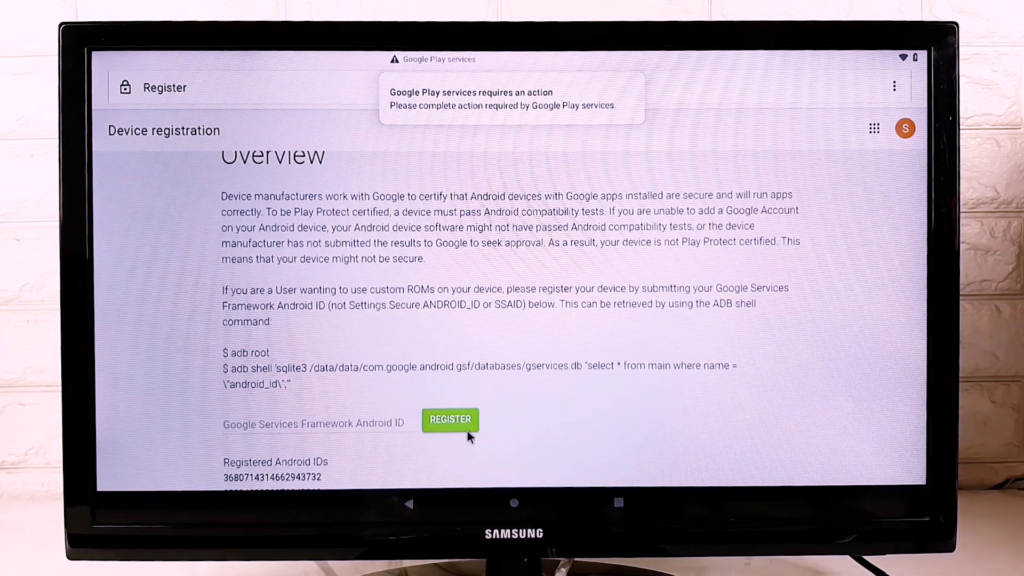
Now restart the machine by holding the F5 key from your keyboard.

When our machine is successfully booted up, we still get this notification from “google play services”. This issue can easily be fixable. Open the Playstore and click on sign in.

After a couple of minutes, we get this sign-in window. Now put your user id and password which you have used before on the device registration.

The error message has gone and also the Playstore is working fine. Let’s test it properly by downloading an application. I want to download a browser in my system because the integrated browser is a piece of junk.

Before downloading, complete the Android setup. So, from the notification section, I have clicked on this message.
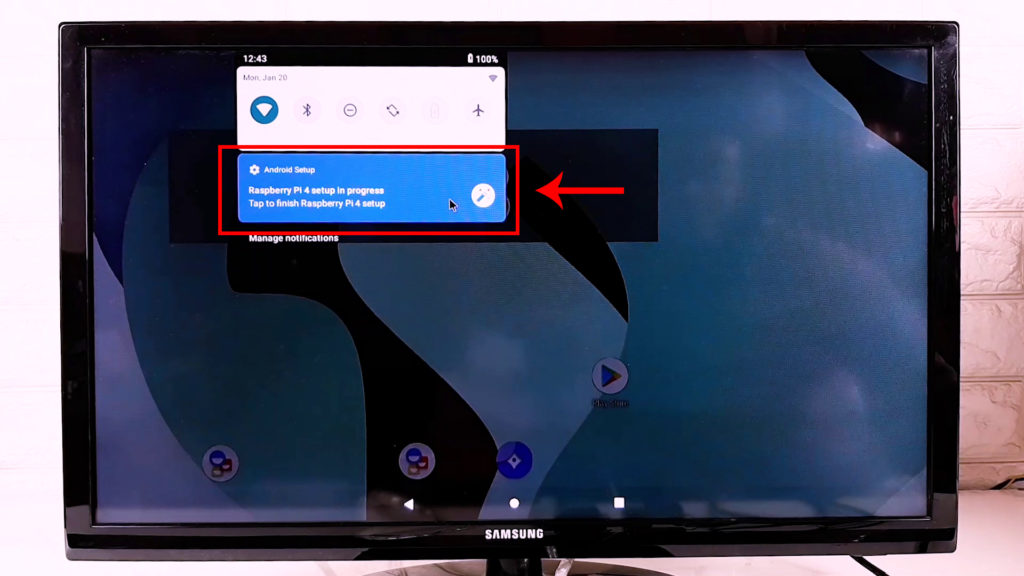
It takes me to the setup window again. After completing the setup process which I think is not necessary to explain to you in detail because everyone has an android device, everything here is as same as that.

Installing Android TV Interface
As I said before, the interface looks like Android, not Android TV. To change this, you’ll need a launcher. Here is the list of [Best] Android TV Launcher Apps that You Can Use. I will use TvHome Launcher which is available on Playstore though but I want to sideload it from my pen drive.
Again, another problem has started after connecting my Pendrive, the OS can’t detect it. It is missing from the file explorer too.

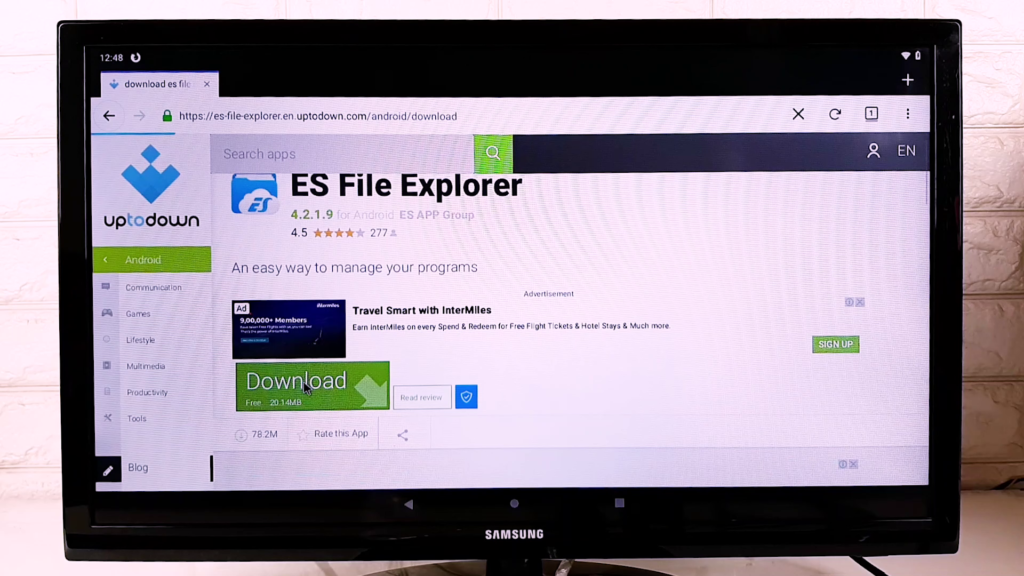
After a couple of minutes of researching, I realize that it is another bug of the OS. To fix this issue, I immediately download ES file explorer from its official website and install it.
In the file explorer, I found that the Pendrive still not properly detected so I remove it from the USB port and insert it again. Now it is detected and properly usable.

So, I open it and install the launcher. When the installation is successful, I click on the home button. Here, I get the two options “Trebuchet” & “Tv Home” I choose “TV Home” & click on “Always”.

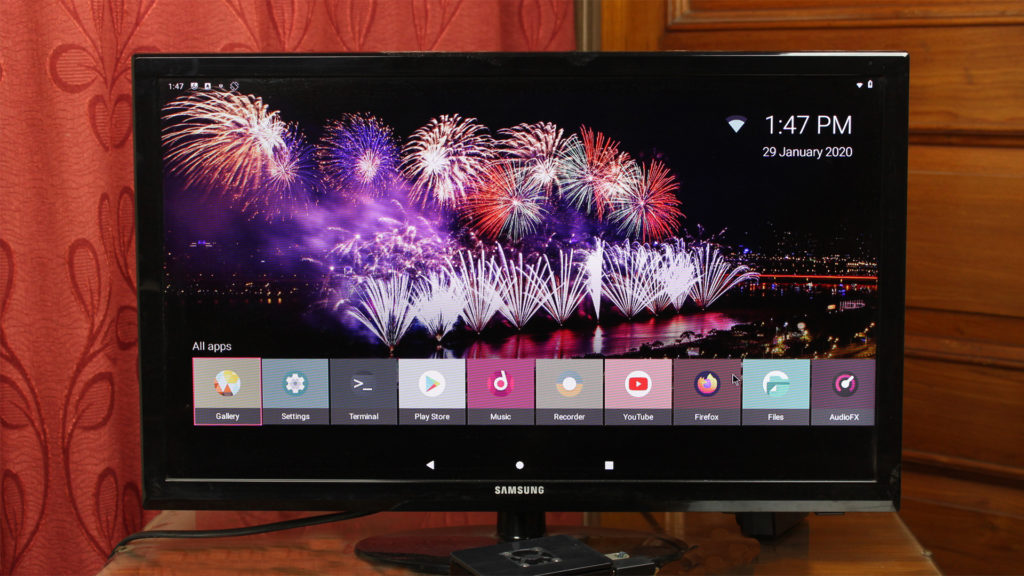
Now the Android looks like this (shown in the picture below). It looks nice and also feels like an Android TV. This is not only a launcher available. There are several good ones. Here is the list of [Best] Android TV Launcher Apps that You Can Use.
Installing Applications:
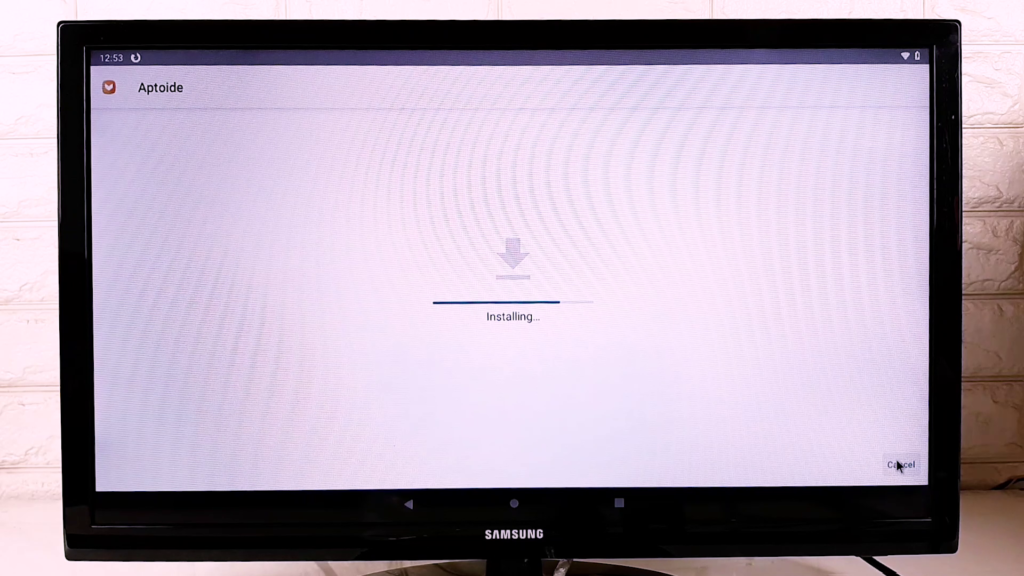
Now you can notice that it looks like a kind of Android TV. But to properly utilize its features, we need to sideload some more apps like Aptoide TV, set orientation, etc.
Applications:
- Aptoide TV
- Set orientation
- Device ID (Previously Installed)
After installing them one by one from the Es File Explorer, I restart the machine again with the F5 key.
Now looking at its interface and features we can say that Raspberry Pie 4 can easily convert a normal TV into an Android TV. So we can say that the Raspberry Pie 4 has the potential to be used as an Android TV box. So, in a nutshell, the project is successful but still, we haven’t installed many useful applications and not properly optimize the pie to get its maximum performance and most importantly right now we aren’t using any enclosure to protect it. We will do it later.
Enjoy Your Media With Android TV on Raspberry Pi!
By now, you should have a Raspberry Pi 4b pumping out videos and music using the LineageOS with an Android TV user interface. To all intents and purposes, you have an Android TV box!
If you run into trouble with performance, so ensure your microSD card is properly rated class 10 or something. Also, check your power supply as it should be rated properly. Also, don’t use any unbranded power supply which can destroy your board quickly.
If you guys enjoyed this video and learn something new then don’t forget to like, share and subscribe and turn on the notification bell on my YouTube channel. If you also love this article then don’t hesitate to comment down below. thanks for visiting.
FAQ:
Q1. Can Raspberry Pi run Android TV?
Yes, Raspberry Pi can run Android TV using custom ROMs.
Q2. Is Raspberry Pi 4 powerful enough for streaming?
Yes, it can handle HD and some 4K streaming depending on setup.
Q3. What do I need to build an Android TV box?
You need Raspberry Pi 4, SD card, power supply, and Android TV OS.
Q4. Is it better than a commercial TV box?
It depends. DIY gives flexibility, but commercial boxes are more stable.
I followed the steps given this article. I am having Raspberry pi4 4GB version. My rasbian raw installation is works fine. But If I flash card with lineageOs – lineage-16.0-20200212-UNOFFICIAL-KonstaKANG-rpi4. I am getting only the boot rainbow screen. Nothing moving after that. Can you help me on this to fix.
awesome post.. for some reason the google licensing thing never was a problem for me. Great potential, however for me, the main reason of getting a pi 4 was 4k support, to which I see that this lineage image only supports 720p which is heading in the wrong direction for me 😉 Attempted to edit config.txt to even support 1080p, but it doesn’t seem to work, seems like my 4k media center is still not a reality… 🙁
hi,
well done videos in fact I installed android tv without problems on my raspberry pi 4. I installed prime tv, infinity and timvision. I have a problem with Disney + because on the playstore it shows me that my device is incompatible.
Instead from aptoide tv I can install the app but as soon as I start it resets the raspberry.
Do you happen to have an idea?
Hi,
Everything is working fine except one thing … Netflix doesn’t seems to be compatible. I was able to deploy many applications and I have no error message but when it comes to install Netflix, it sais it’s not compatible with my device.
Does anyone have a tip on how to fix this ?
Thanks