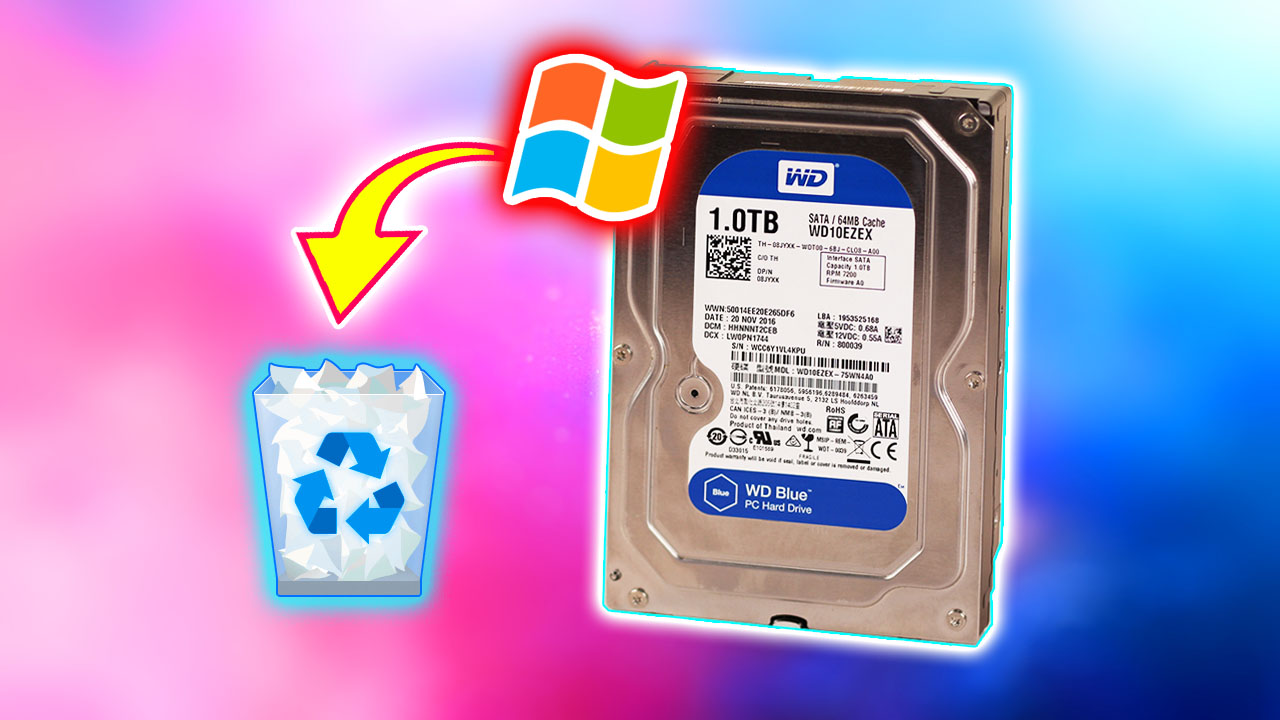
So, you have just transferred the Windows from the HDD to SSD, and now you’re thinking of freeing up the space by removing the old OS from the hard disk. No, you can’t completely remove the OS by just formatting the hard drive from Windows. You need to clean the Hard Drive completely. All the small hidden partitions that Windows created should be removed. Only formatting the old C drive is not enough. Read this article and follow the simple steps and I can guarantee that you could successfully and properly clean the old Windows from the hard drive.
Also Read: Why Should You Not Future Proof Your PC? – GEEKY SOUMYA
Format each Volume of the HDD from Windows – Bad Idea
If you’re thinking of formatting each visible volume from Windows file explorer to remove each and every trace of Windows from the old hard drive then you’re completely wrong. After formatting that way, at a first glance it seems that Windows is removed and everything is free but when you restart your machine you may sometime find the OS in SSD is not booting reliably. Sometimes two individual Windows will be detected and you will be asked to boot into one (As shown in the picture below).
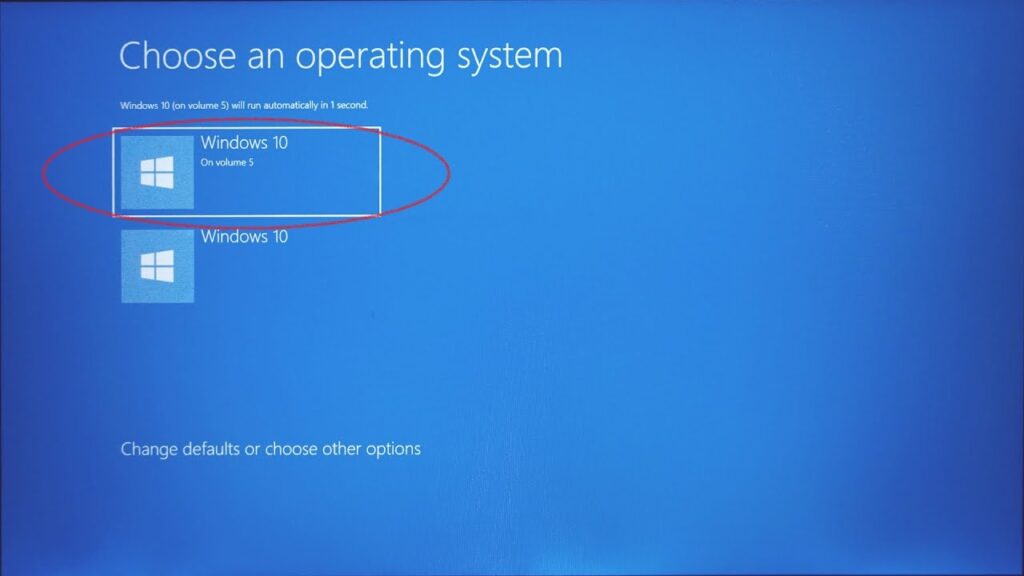
It’s ofcourse quite annoying and confusing. This happens because of the hidden volumes in the hard drive that Windows has created for recovery or something similar. To remove all the traces of the previous Windows installation you have to remove this volume. It’s actually not quite hard as you think. You can do it from Windows but not from file explorer.

Precautions – Backup
The process we are going to perform will destroy all the data inside the HDD even those will be removed that are in the different partitions so if you need anything then back up all the data on a separate drive.
Clean Hard Drive and Remove the Windows Completely
This is quite simple. Just open the CMD and write a few lines of command and you have the fresh new hard drive.
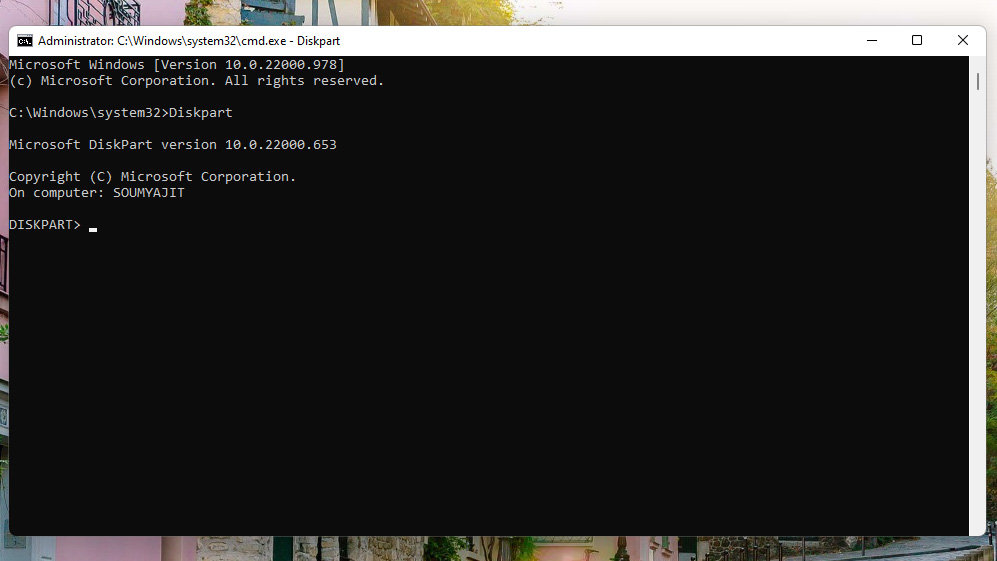
Press Windows + R from your keyboard. This will open up Run. Just type ‘CMD’ and hit Ctrl + Shift + Enter to run the CMD in Administrative Mode.

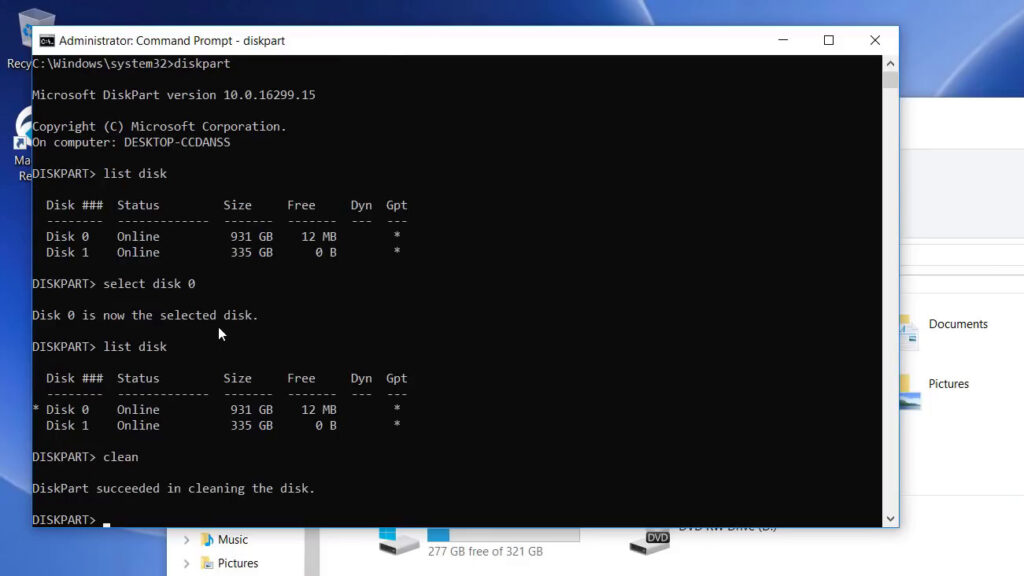
In the CMD use the command ‘DiskPart’.
In the DiskPart type ‘List Disk’. This will bring all the connected hard drives and SSDs.
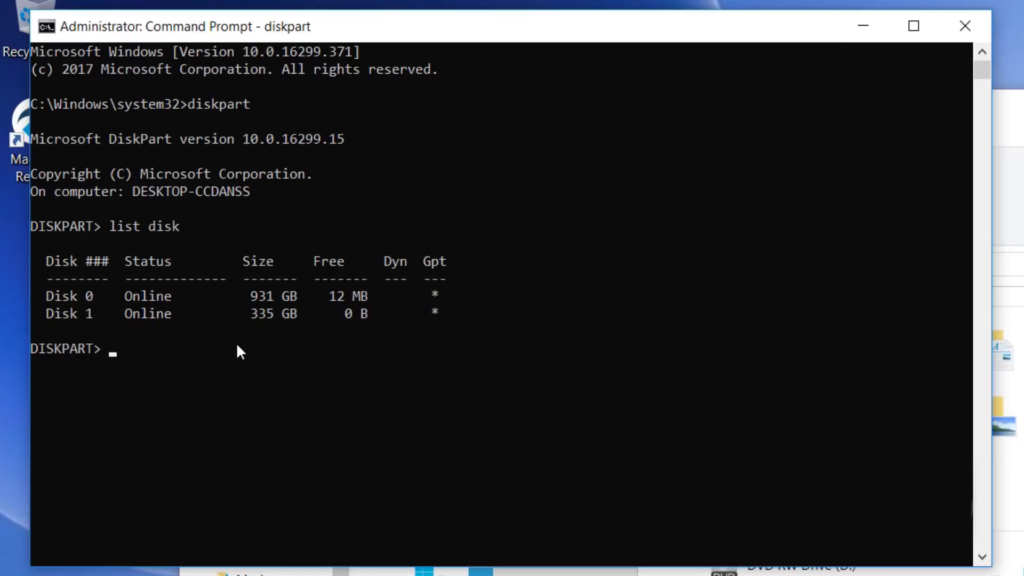
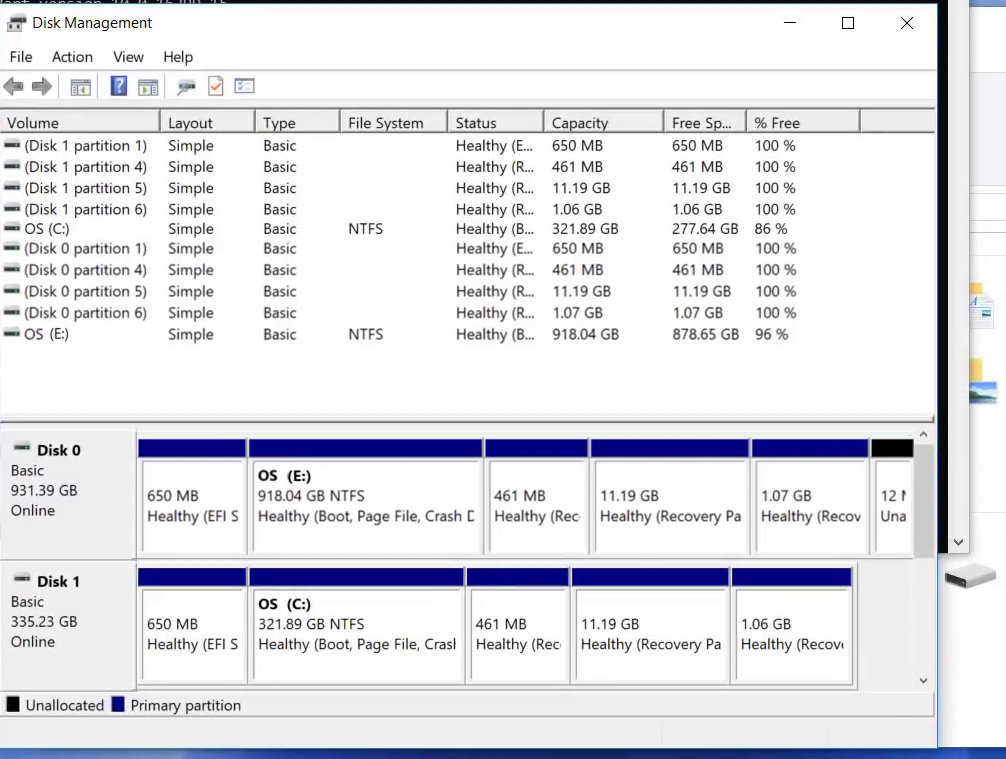
Now we need to select the hard disk which we need to clean. Here it’s quite confusing to detect the right hard disk especially if you have connected the same capacity SSD. As you have noticed the only way to identify the disk is by just looking at their capacity.
What you can do is check the disk name from ‘Disk Management’. Just minimize the CMD windows and type on the search box of Windows ‘Disk Management’ if you know the drive letter of the hard drive then you could easily identify the Disk name. I know Windows assign the hard disk drive letter ‘E’. And the respective volume with drive letter E is fall in Disk 0 section. So from the CMD, we need to clean Disk 1.
Now let’s move to the DiskPart window and type ‘Select Disk 0’ in my case. Your disk number could be different for example ‘Select Disk 2’, ‘Select Disk 3’ anything. Ofcourse please be careful while doing so, if you select wrong and clean it all the data will be removed and almost unrecoverable.

Anyway, after selecting just type ‘Clean’. This will take some time depending upon the drive capacity and speed. When this process is finished all the volume and variations are removed from the hard drive. Now you need to create everything.
Create Volume and Reuse the Old Hard Drive
Ok, we are done with the CMD you can close all the CMD windows and open ‘Disk Management’. It will first prompt you to initialize the disk, where you can keep it as a GPT disk which is the default and hit ‘Ok’.
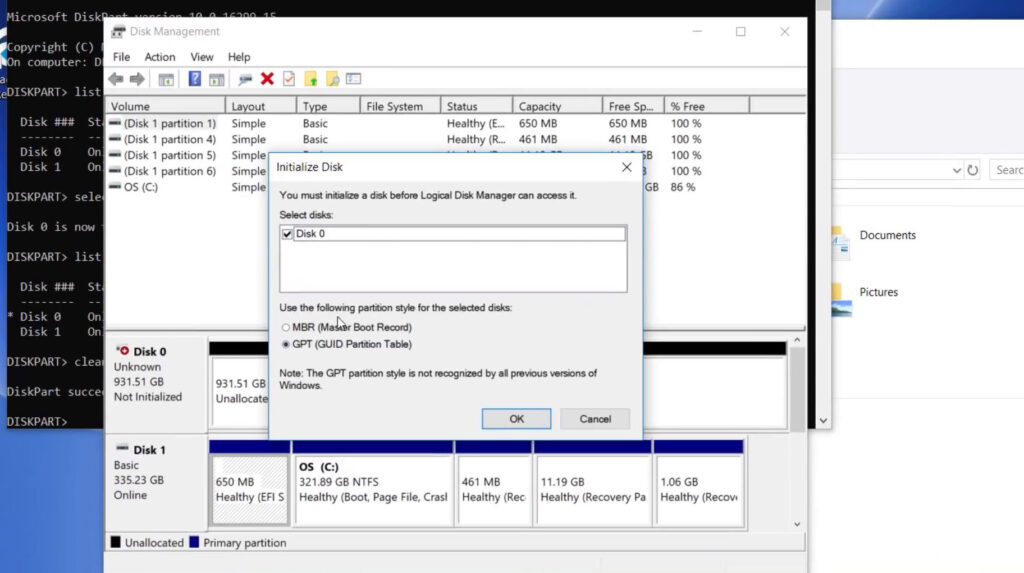
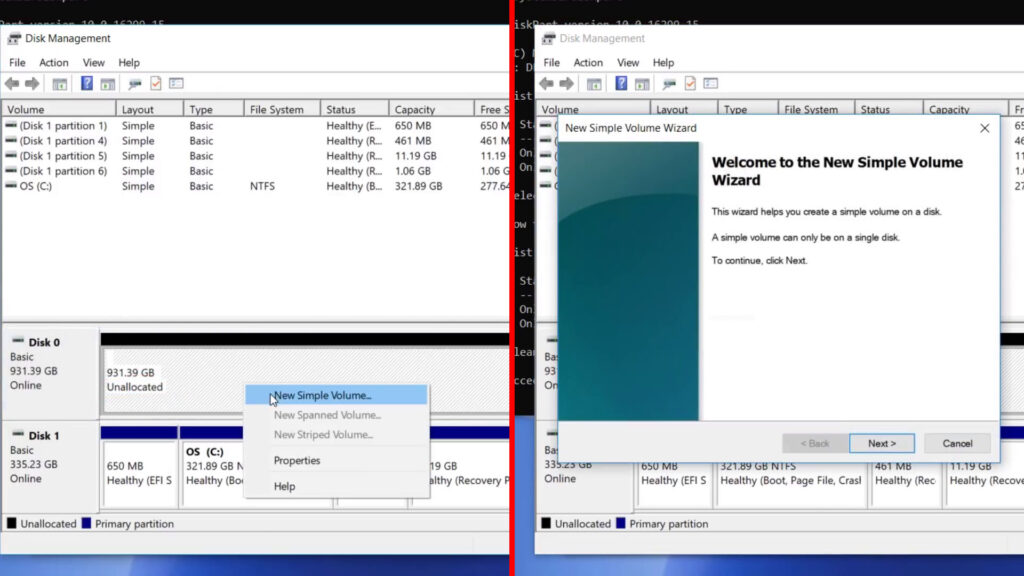
Here at the bottom, you can find unallocated storage which in my case is under Disk 0.

Just right-click on it and select ‘New Simple Volume’ which launches a wizard.
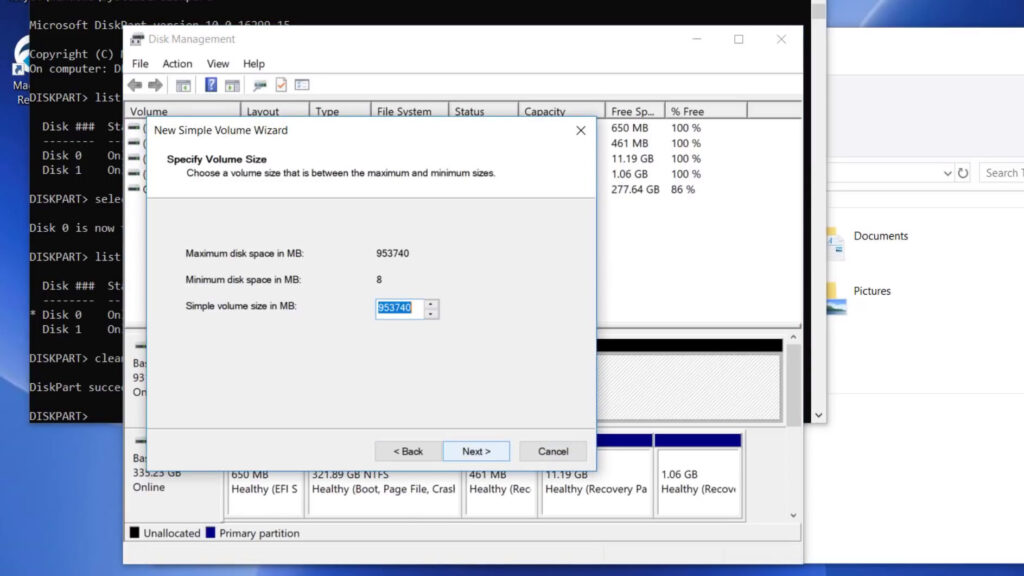
Here, click on next, and specify how large you want to create the volume. I just keep it at the maximum size so that I can have one large 1TB partition. Click on ‘Next’.
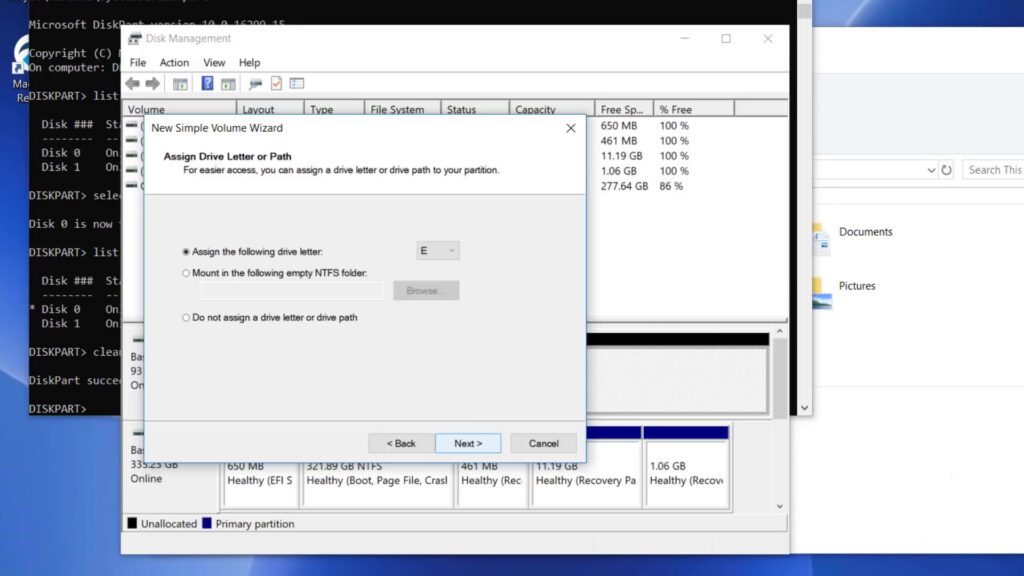
Now you can select a drive letter according to your choice. I keep it as default ‘E’ and hit ‘Next’.
Here you can name it accordingly and again click on ‘Next’.

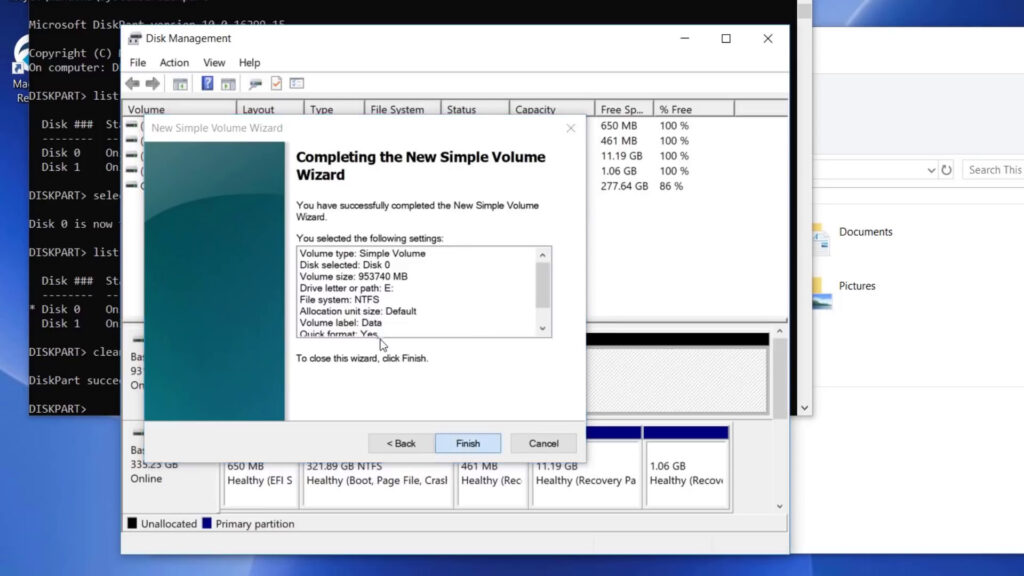
In this last part, you can verify your previous choices if you’re ok with that then just click finish.
Don’t Miss: How to Create App Folders in Windows 11 Start Menu? – GEEKY SOUMYA
In the Concluding lines…
Now you have a neat and clean fresh new hard drive without any sign of previous Windows traces. You can use this hard drive however you want. This is actually the right way to clean the hard drive. The same procedure is also applicable to SSDs. If you guys find this article helpful then don’t forget your thoughts in the comment section below also share it with your friends if anyhow this article will help them. Thanks for visiting.