
Currently, Windows 11 is pretty much stable. There is though quite a bit of bug here and there but if you’re just upgraded from Windows 10 to Windows 11 then probably you will face a lot of different problems. Like Bluetooth is not working, audio issues, Ethernet or Wi-Fi is not working, and so on. You can’t even roll back to Windows 10 from Windows 11 after the initial 10 days. Now you might think to change a couple of settings or change a bit of Windows Registry settings but if none of them work, factory reset Windows 11 is the only option to go. It basically removes all of your apps, files, and folders from the C drive, settings preferences, and carried-over files that means, everything. However, you have the option of whether you want to delete the User Data aka your personal files from the C Drive or not. We will come to that part sooner but first, let’s carry on how to factory reset Windows 11 as simply as possible.
Related: How to Enter the BIOS/UEFI in Windows 11 – 3 Simplest Ways
Factory Reset Windows 11 from Windows 11 Settings App
This method only works if your Windows 11 PC is functional – booting is fine and you are easily able to sign in to your computer. You may ask, why? Because, if you can’t sign in to Windows then you could not open up Windows 11’s settings.
To reset your Windows 11 laptop or desktop:
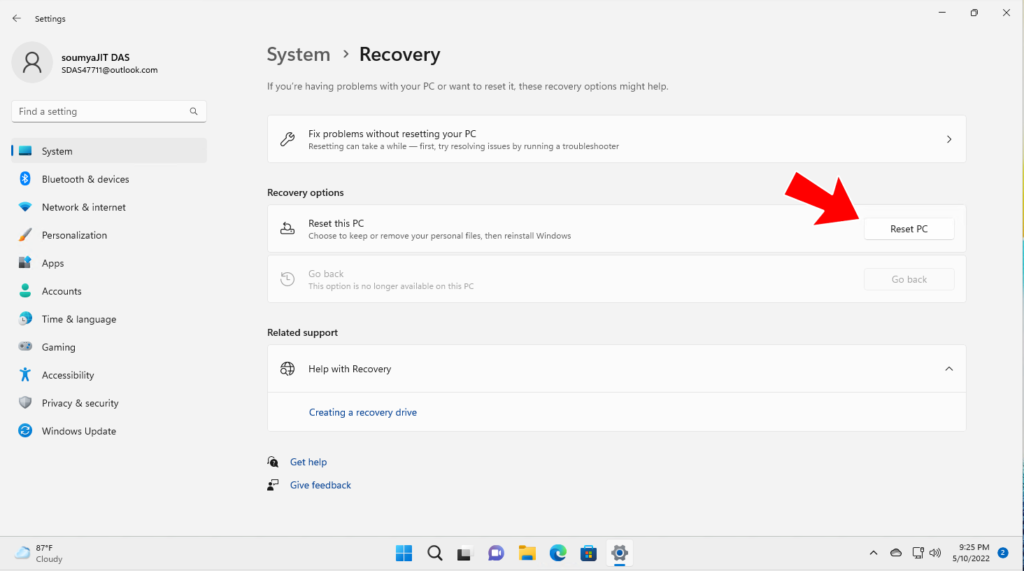
1. Press the Windows key once or click on the little Windows logo on the Taskbar and search for settings and open it or you can also open the Settings using the “Windows + I” keyboard shortcut in Windows 11. Now move to ‘System’ > ‘Recovery’.
2. Next, click the “Reset PC” button under Recovery options.
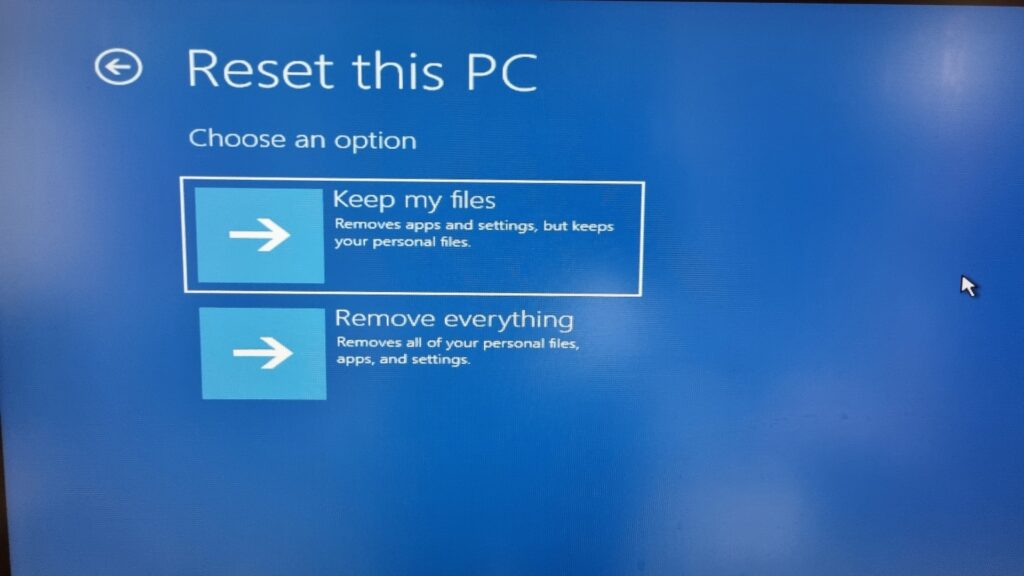
3. Now a pop-up window will open up saying ‘Keep my files’ & ‘Remove everything’. If you go for ‘Keep my files. Windows 11 will re-install and all of your installed programs will remove but all of your personal files inside Desktop, Documents, and the Downloads folder will not be removed. Obviously, files inside the other drives will definitely be safe.
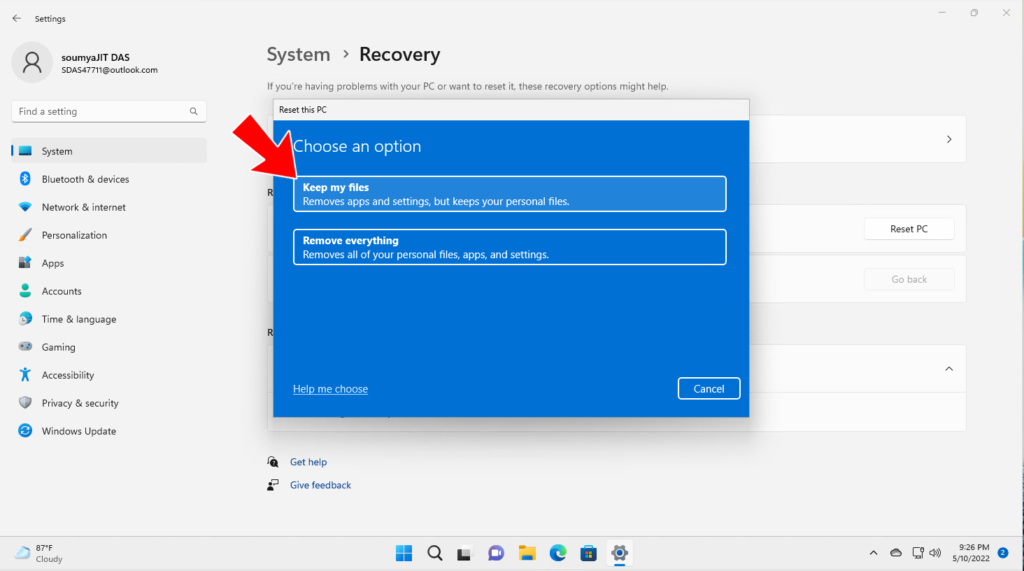
By selecting the second option, all of your files from the C Drive will remove. Just be careful and take a backup of your files inside the C drive.
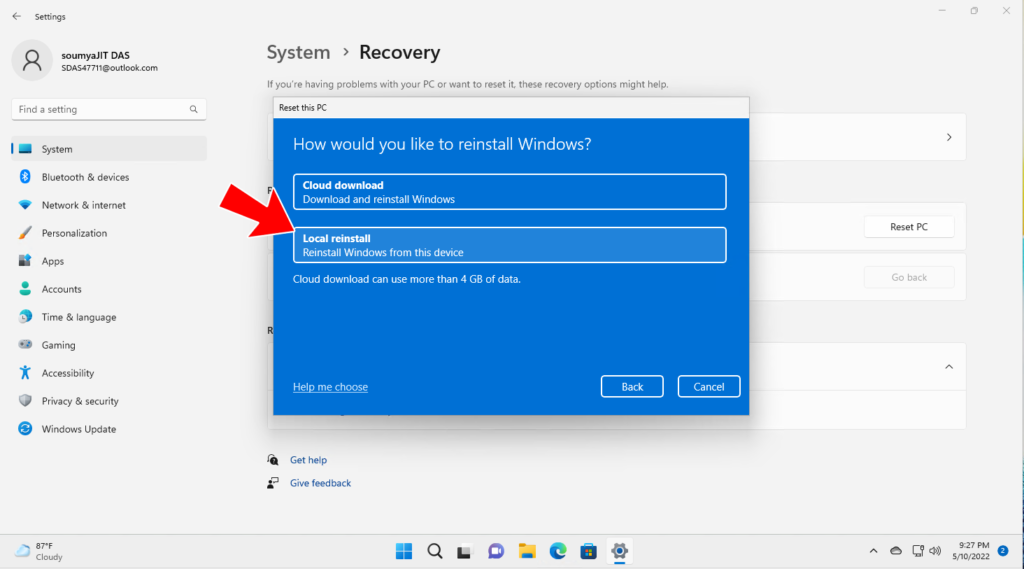
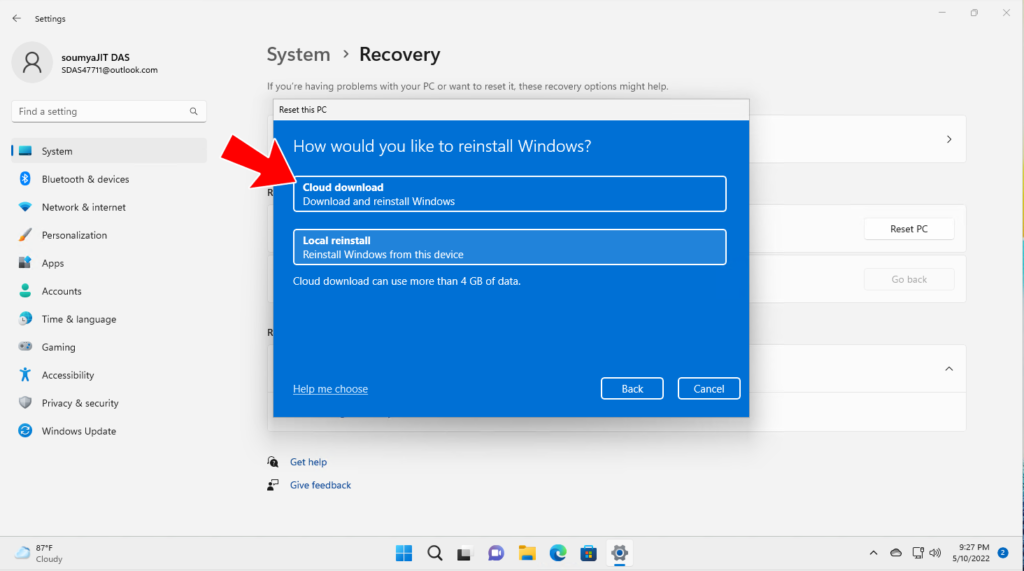
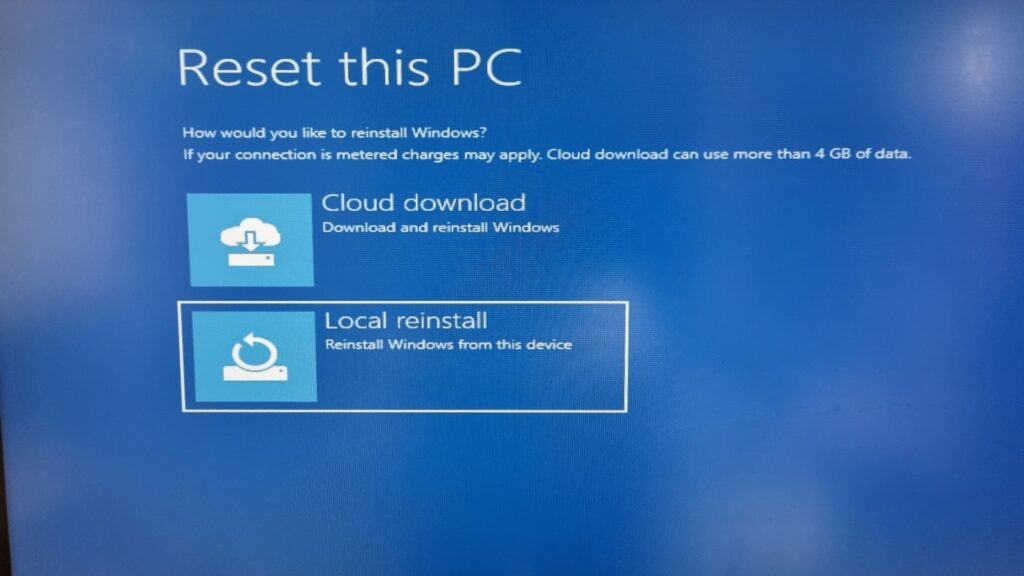
4. In the next step, you could either choose the ‘Cloud Download’ or the ‘Local reinstall’ option. I do prefer to go with ‘Local reinstall’ because it not only saves a lot of time but also saves the internet too. The same version of Windows 11 will be reinstalled by applying the local reinstall option, on your PC.
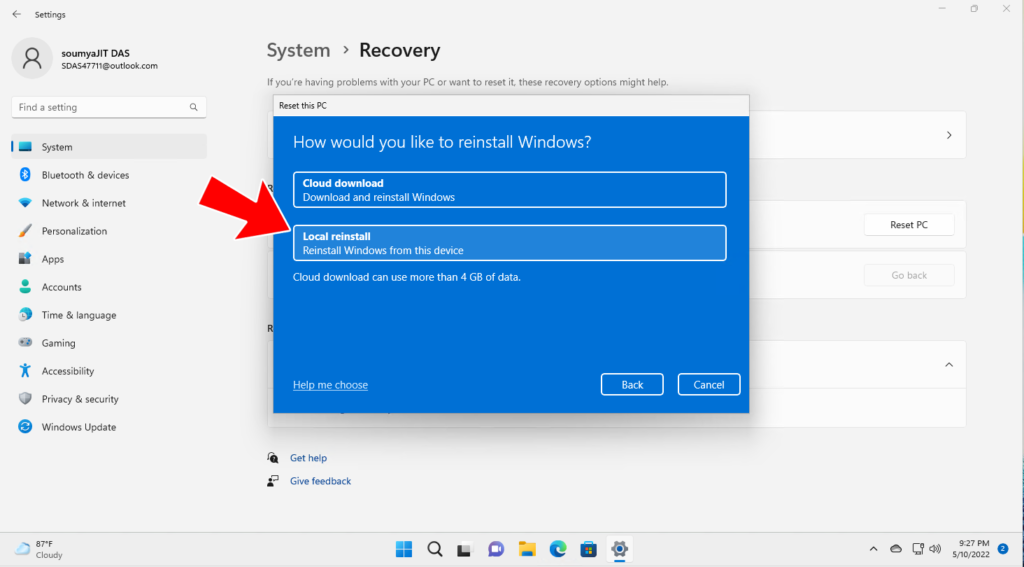
Alternatively, if you go with the first option, you have to download 5 GB of Windows 11 installation files from the internet. That definitely adds a lot of hassle if your internet speed isn’t fast enough. It takes hours maybe days to download.
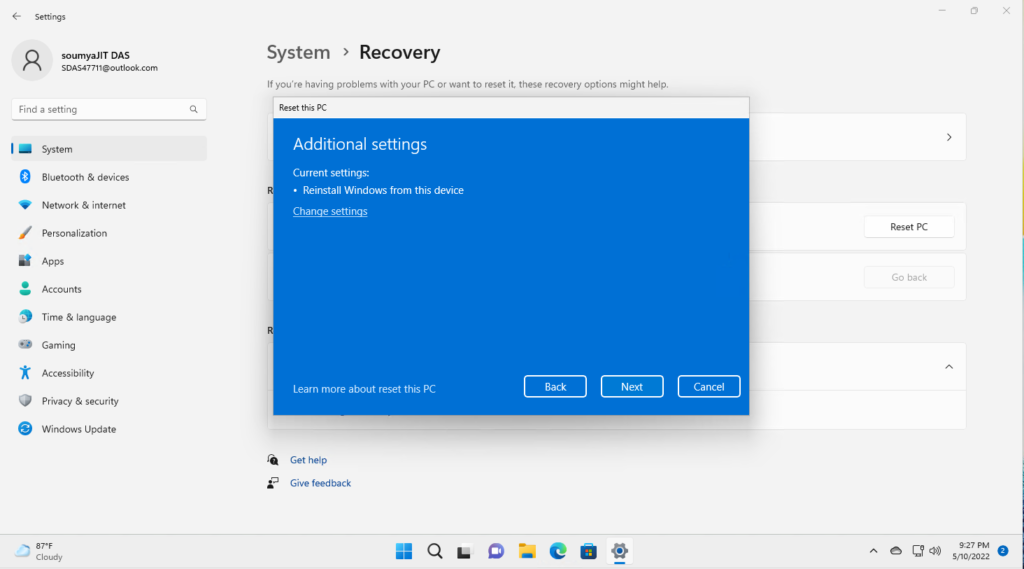
5. Then, make any changes to the “Additional settings” if you’d like, and click on “Next“.
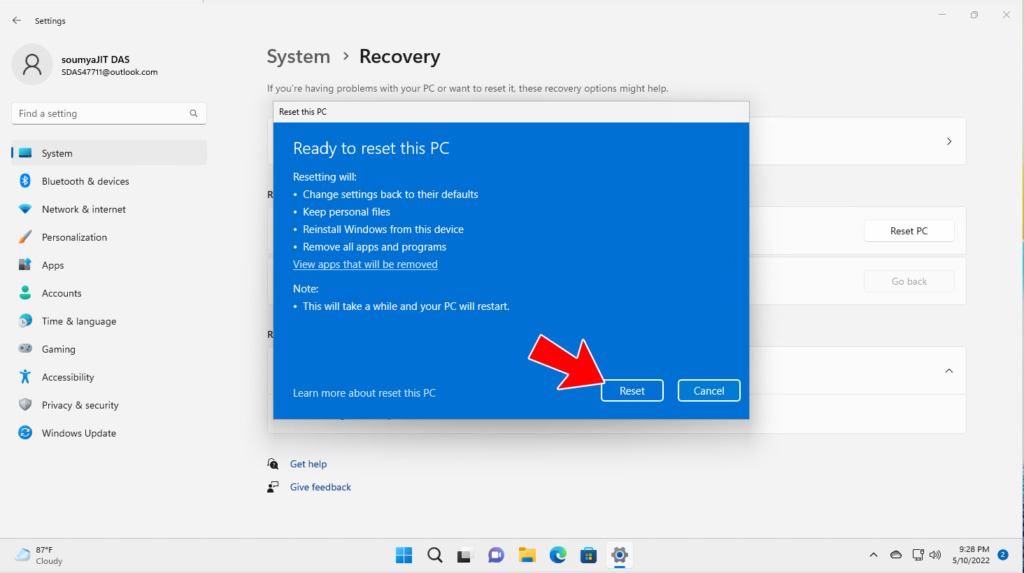
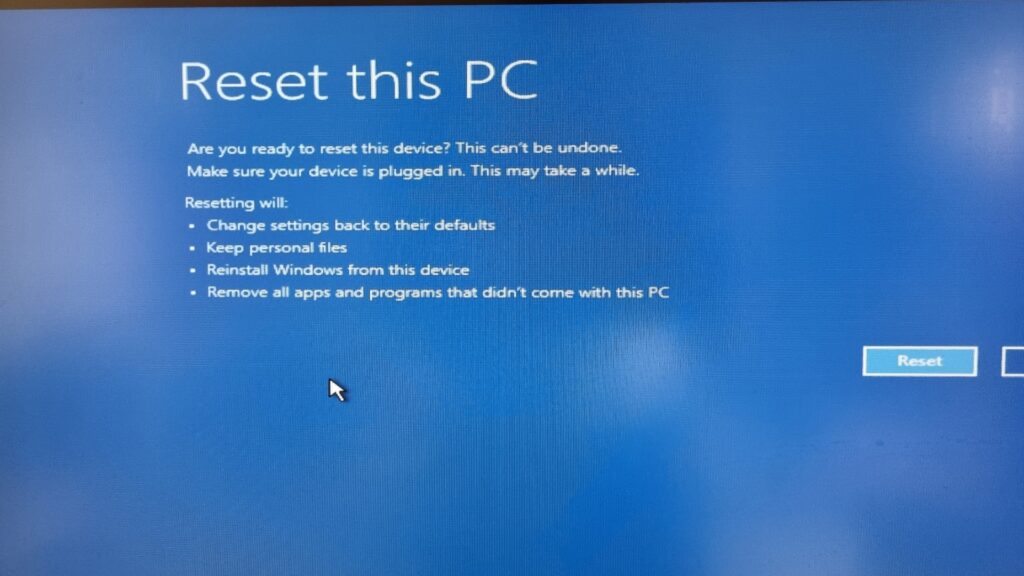
6. Finally, go through the summary, double-check everything and click on “Reset“. Your PC will now restart, and the factory reset process for Windows 11 will begin.
If you install Windows 11 locally, it will take some time obviously. Just wait patiently and follow the on-screen instructions to set up your PC once again.
If Windows 11 isn’t Booting, how to Factory Reset Windows 11?
The previously mentioned method is only capable until your computer is working – means, booting is fine and you can be able to sign in to Windows. If your PC is not booting, you need to reset Windows 11 from the Recovery.
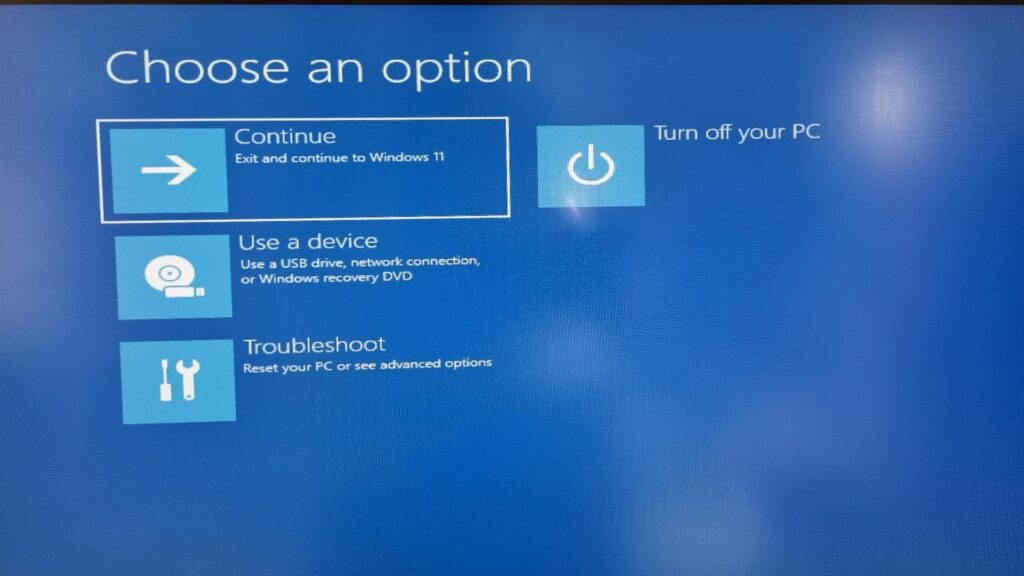
There is a trick here to enter into the recovery. Most of the time, if Windows 11 can’t load or boot properly, a Recovery option appears on the screen. If that does not happen, just turn on and off your PC a couple of times using the power switch of your PC then Windows 11 will be forced to show the Recovery screen.
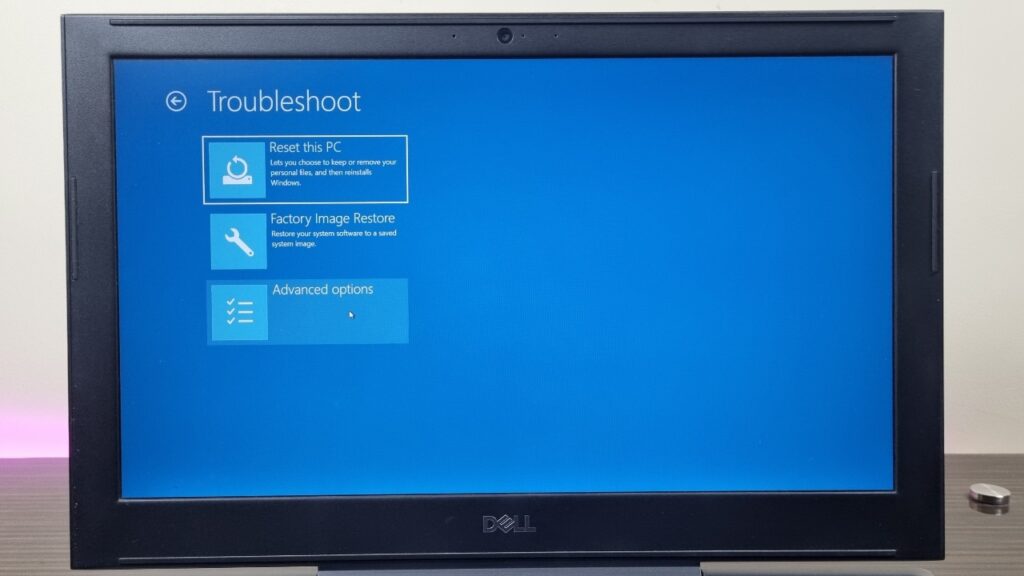
1. When the Recovery screen appears in front of you, click on “Troubleshoot”.
2. Next, choose the “Reset this PC” option.
3. Following options are now as same as before, but we are accessing it via Recovery mode in Windows 11 so just click on Keep my files > Local reinstall and there you go.
Other than Keep my files > Local reinstall options, You can choose ‘Remove everything’ or ‘Cloud download’ respectively if you want to delete all your files and programs or want to download and re-install the latest copy of stable Windows 11 from the internet.
5. Now, your PC will restart and the Windows 11 factory reset process will begin.
Still, be patient, it will take quite a bit of time depending upon what option you have chosen.
Most of the time, both of these abovementioned methods do their jobs fine but in some cases, if both of them fail then the next option will help you to bring your Windows 11 PC back to life.
Factory Reset Windows 11 with Bootable USB Drive
If none of the previous methods work for you then it’s time to clean install Windows 11 from a USB flash drive to factory reset your computer. This would not be a much-complicated process as most of the dos & don’ts will be understandable using on-screen instructions. We will bring light to that topic soon. Clean Windows 11 installation will remove all programs and files from the C drive and install Windows 11 once again. This process won’t affect files on any other drive.
Also Read: What Happens If You Don’t Activate Windows 11?!
Concluding Lines…
So, these are the ways that you could use to factory reset Windows 11 PC. It’s obviously not rocket science instead it’s pretty simple and straightforward. Especially, if you log in to Windows then everything will be much simpler. You just need to follow the on-screen instructions and voila! Your Windows 11 PC will be reset.
Things will be a bit tricky if Windows 11 doesn’t boot up but there is a simple solution as I have mentioned. Finally, if you have any questions, let us know in the comments section below. Thanks for visiting.