If you guys are using Windows 10 then you’ve probably heard about a tool named Hyper-V. It is a virtualization software aka tool that is included with Windows 10 Pro, Enterprise, and Education license but it needs to be downloaded and installed separately. It is used for running virtual machines on CPUs that support virtualization. If you are planning to run a lot of virtualization then this is a pretty feature-rich and most user-friendly tool to have. In this article, we are actually going to Set up Hyper-V through all the step-by-step details that help you to create single or multiple virtual machines on Windows 10.
What Is Hyper-V?
Hyper-V is virtualization software that virtualizes not only the operating systems but also entire hardware components, such as hard drives and network switches. No, it is not as same as Fusion, VM WARE, and Virtualbox. They only can virtualize the user’s device not the server but Hyper-V does both. It is an inbuilt tool that runs only on the 64bit version of Windows 10 Pro, Enterprise, and Education. With Hyper-V, you can run multiple virtual machines at once until your system hardware runs out of resources. That is really cool, isn’t it?
By the way, Hyper-V has three different versions:
• Hyper-V for Windows Servers
• Hyper-V Servers
• Hyper-V on Windows 10
We’re not discussing the first two much. In short, Hyper-V for Windows Servers is an add-on & can be found on Windows Server OS. Hyper-V Servers is a standalone solution which is used to manage virtual and dedicated server instances, just like Hyper-V for Windows Servers.
‘Hyper-V on Windows 10’ is the version that we run on our laptop and this is the primary topic of this article.
N.B. Hyper-V is not limited to Windows 10, it is also available on Windows 8.1.
System Requirements To Run Hyper-V:
Definitely not every Windows 10 machine can handle Hyper-V. According to Microsoft, to run Hyper-V smoothly, a computer should have at least 4GB of RAM but our experience says there should at least 8GB or 16GB RAM to smoothly run the operating system that you install on the Hyper-V.
How to Use Hyper V?
Hyper-V is preinstalled with Windows 10 but you have to download some packages to complete the installation.
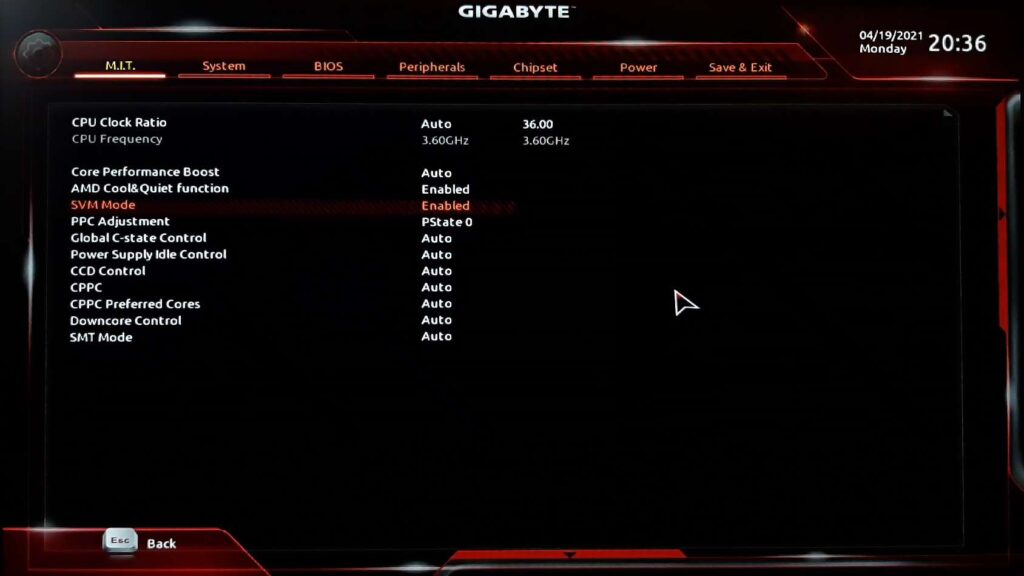
First of all, to set up the Hyper-V, we need to enable ‘Virtualization’ from BIOS. Every BIOS or UEFI is different and also there are other different names of ‘Virtualization’ that are listed. As we are using Gigabyte Motherboard, they named it ‘SVM Mode’. So look for ‘Intel VT-x’, ‘Intel VT-d’, or anything on similar lines. If you can’t find anything then google it Something like this: “How to Enable ‘Virtualization’ on ‘Your Motherboard Manufacturer’?”
To enter into the BIOS, in our case, we have to hit the ‘Del’ key a couple of times when the motherboard manufacturer logo appears on the boot screen. Then enter into the ‘MIT’ tab, select ‘Advanced Frequency Settings’. Select ‘Advanced CPU Core Settings’ > ‘SVM Mode’ (Virtualization Technology). Hit Enter to set it to Enable. Now press the F10 key to save and exit.
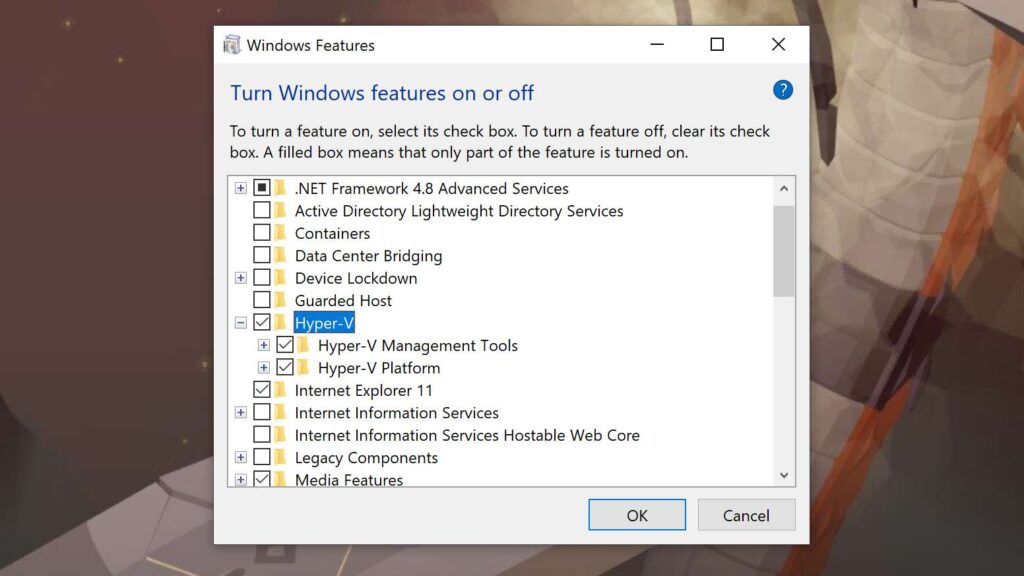
After the successful reboot, Windows boots up. Now press ‘Windows key + R’ from your keyboard. Now the ‘Run’ window appears. Type ‘optionalfeatures.exe’ and hit Enter.
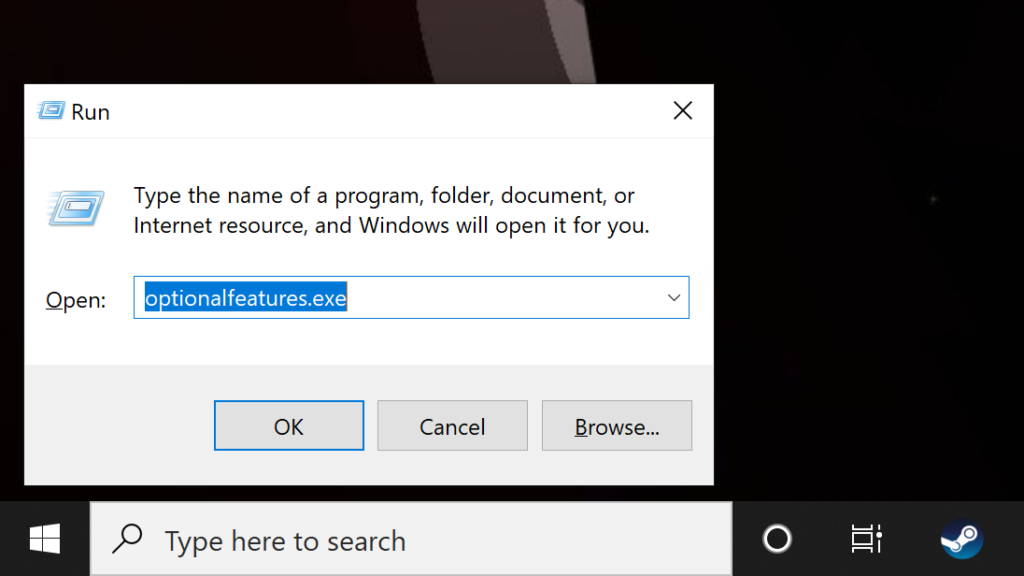
Now, On the ‘Windows Features’ window, scroll down and look for ‘Hyper-V’. Now, enable all the checkboxes under Hyper-V and hit the OK button. It will start installing the necessary packages and will ask you to restart the computer once the installation is finished.
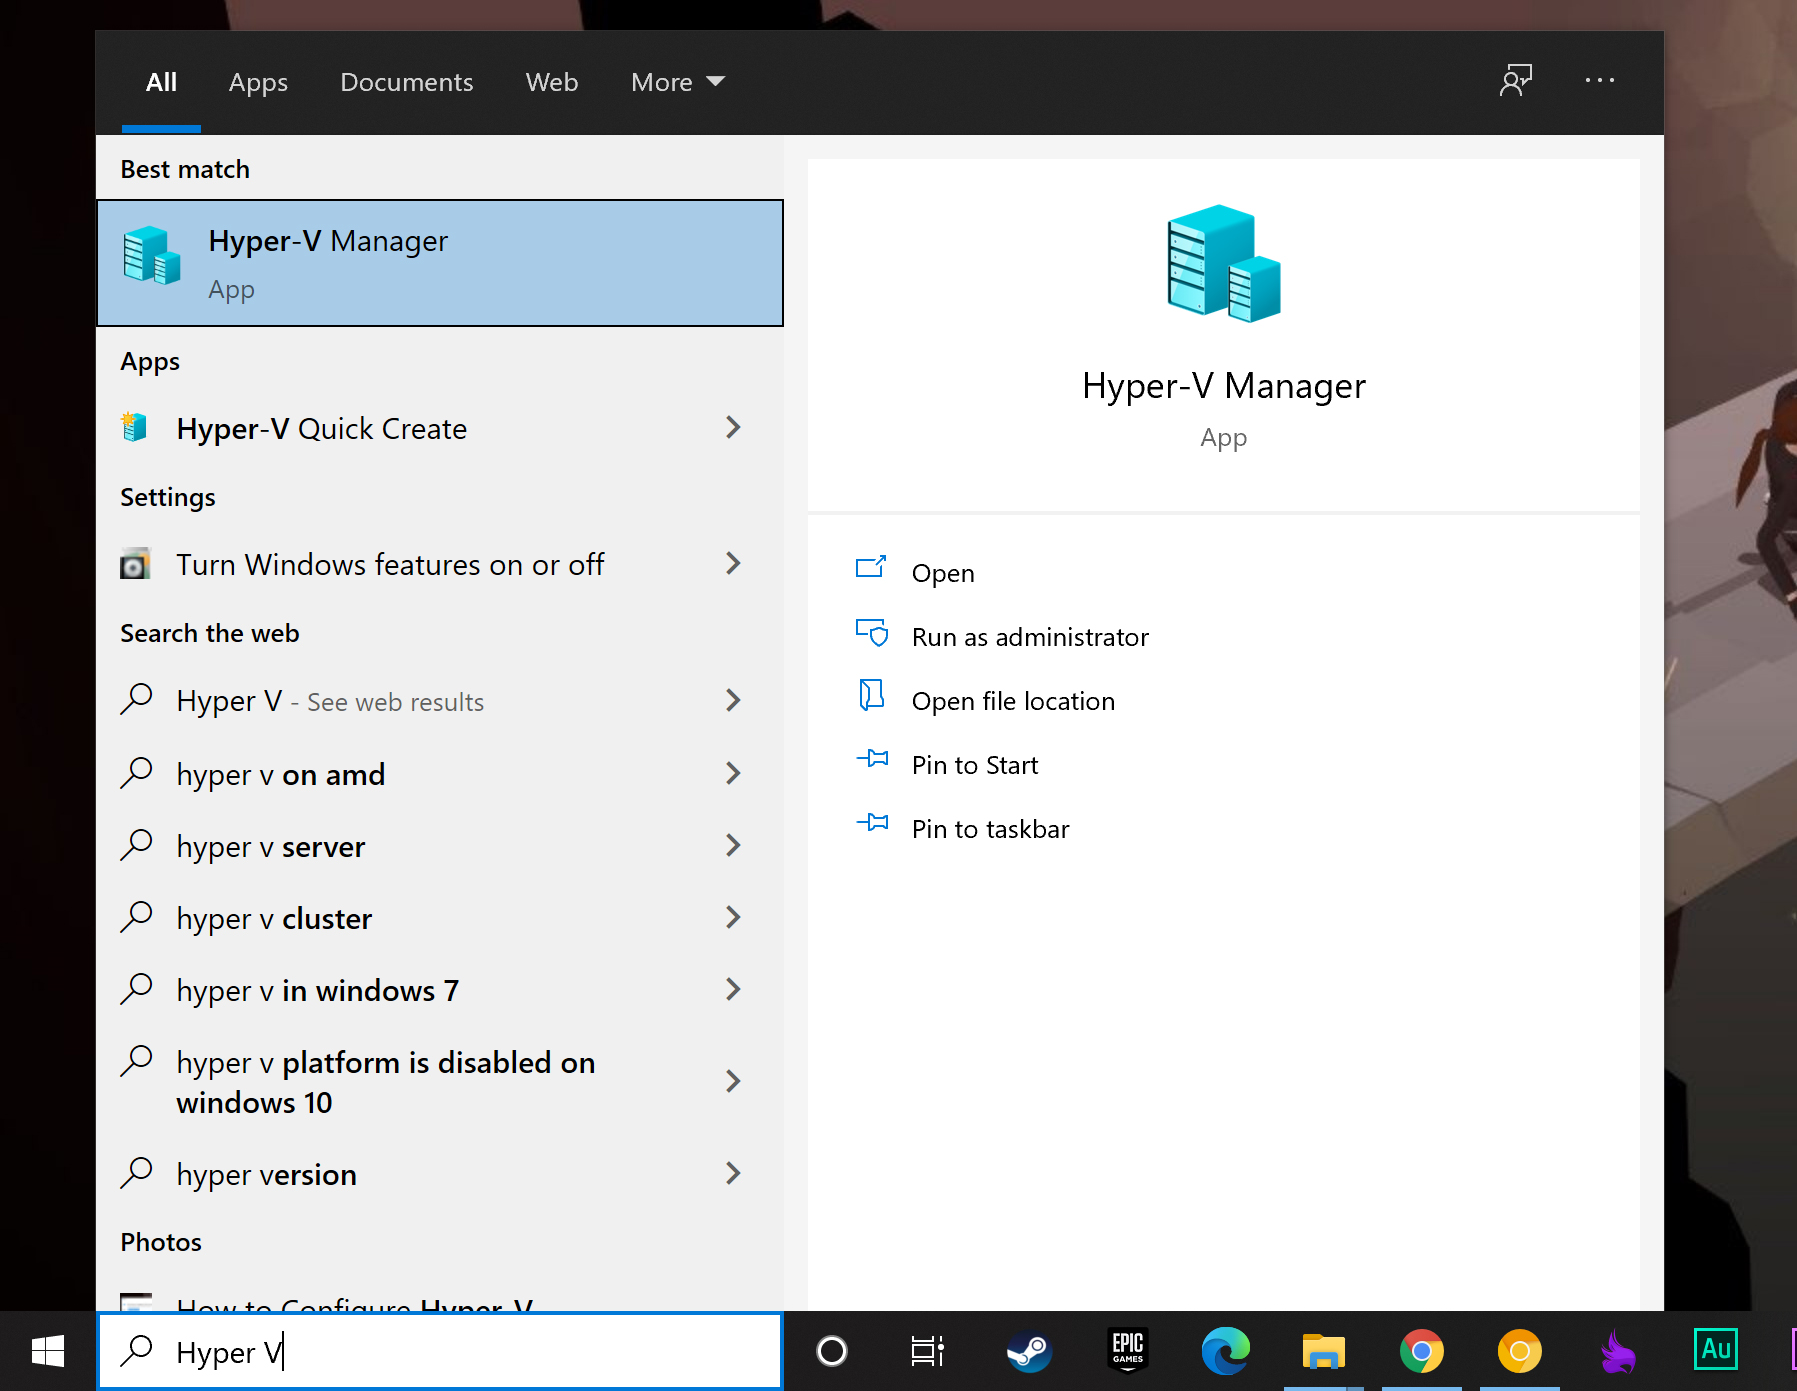
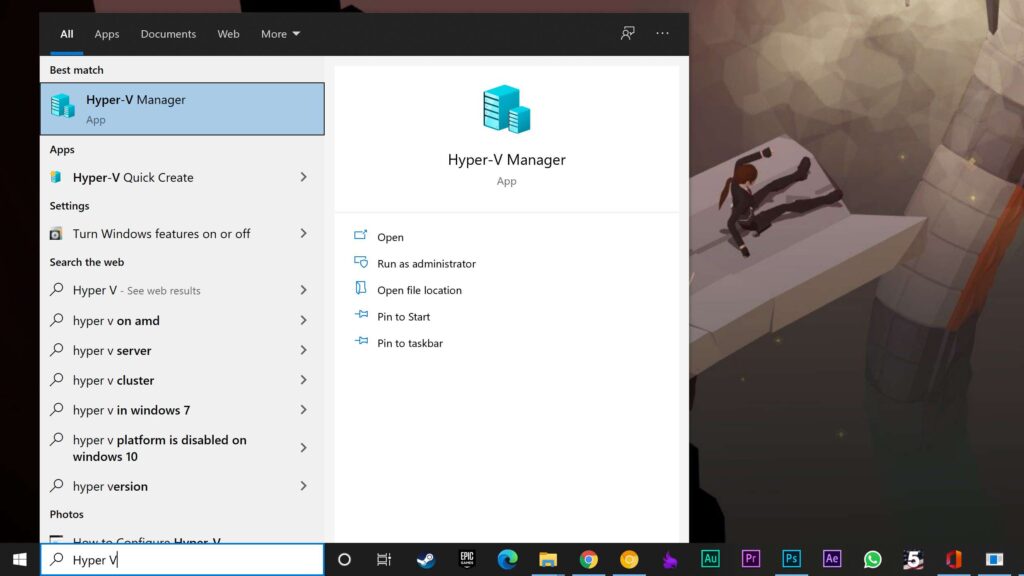
So, the Hyper-V is now successfully installed. Just search it, ‘Hyper-V’ on the search bar. The first option is our concerned one. Click on it.
Download the Operating System that You Want to use…
So, the Hyper-V is ready to use. Now you need to download the operating system that you want to use. You can download ‘iso’ files or ‘VHDX’ file of the operating system. However, we would prefer to use the ‘iso’ file but for some cases, if there is no ‘iso’ file of the operating system available then we have to download the ‘VHDX’ file to use the operating system. Ex: Windows 10X
Read Now: How to Install Windows 10X on PC?
Install OS on Hyper-V using VHDX file
Now the VHDX file and the Hyper-V are ready. For example, we are going to install Windows 10X.
Open Hyper-V and right-click on the computer name, choose ‘New’ and select ‘Virtual Machine’ from the top-right panel.
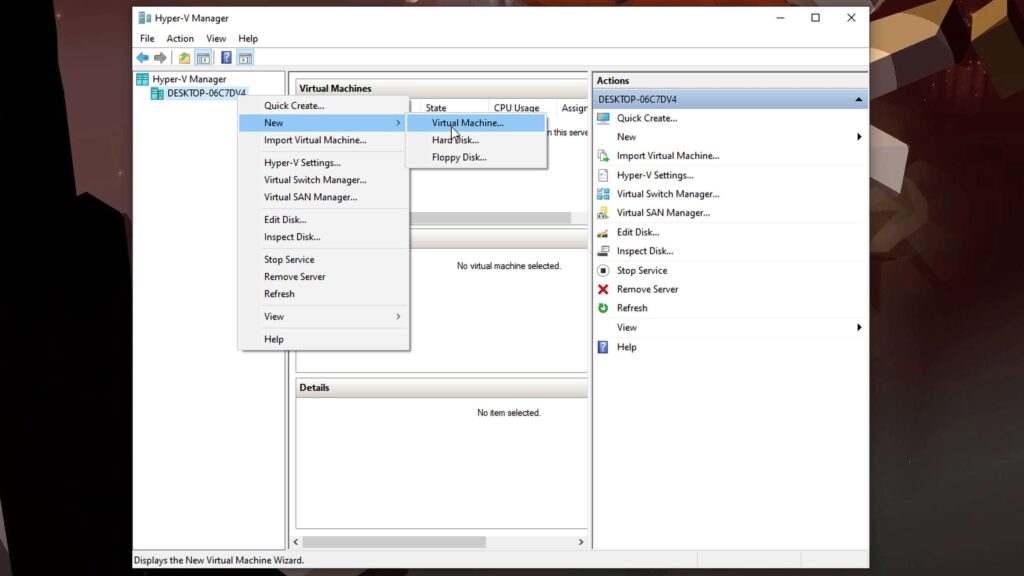
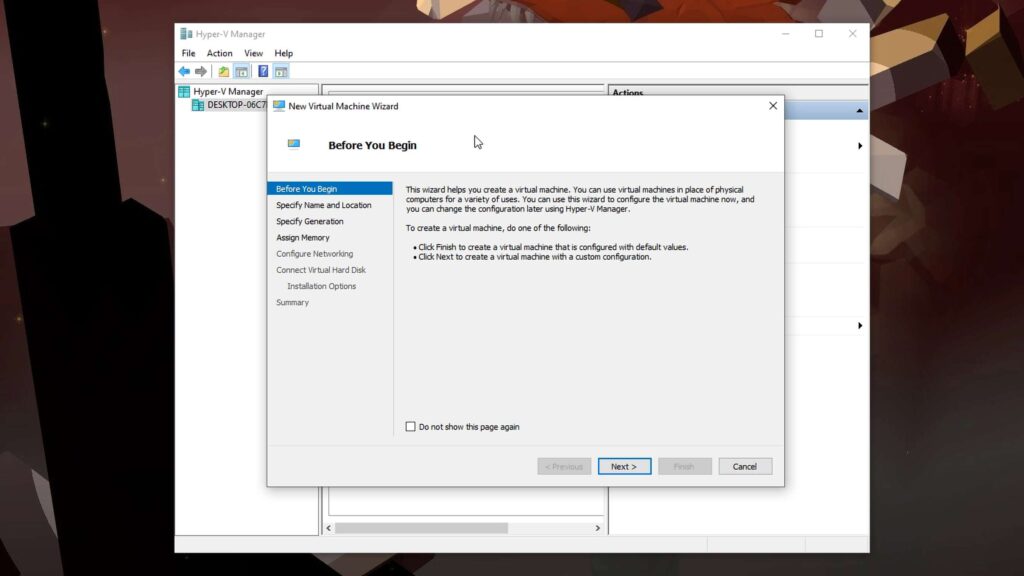
On the ‘Before You Begin’ section, click on ‘Next’.
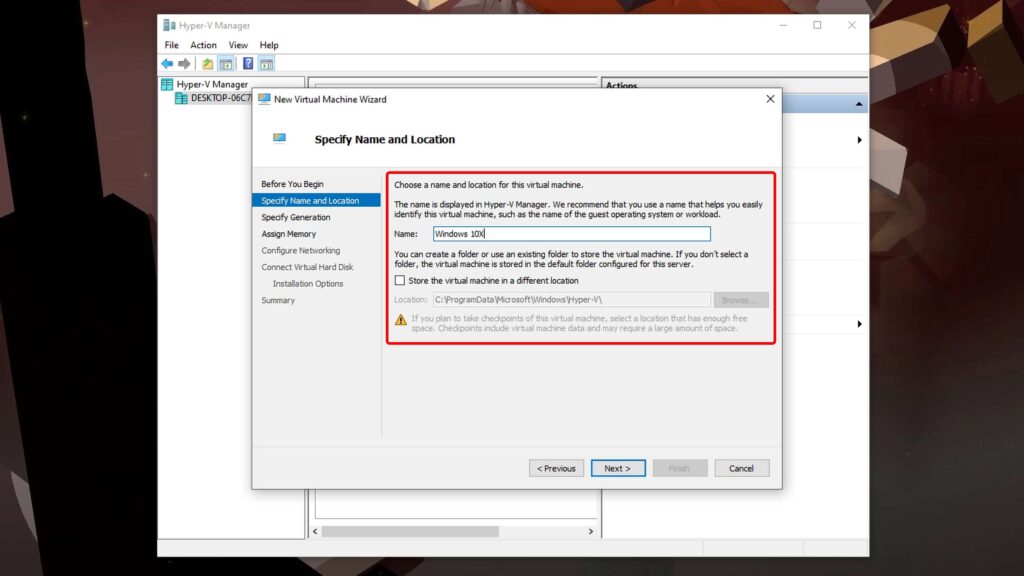
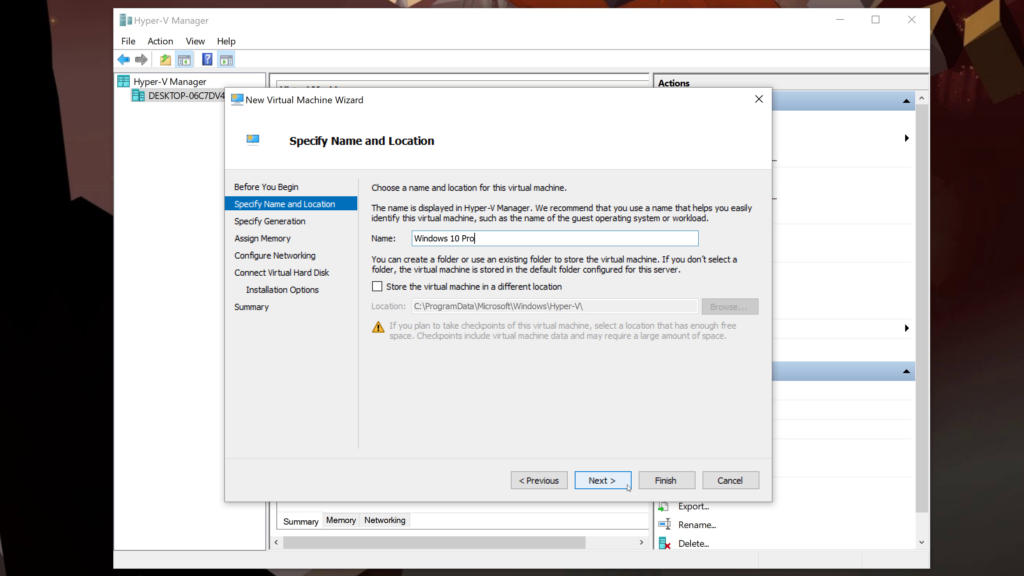
Provide a name to the virtual machine. We have named it ‘Windows 10X’. It is your choice, you can give it whatever you want.
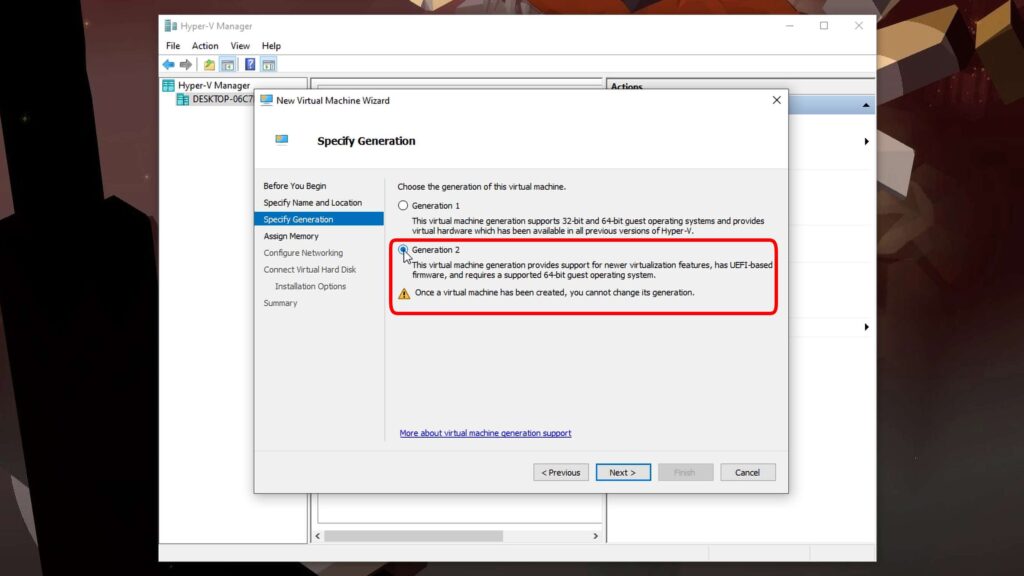
On the ‘Specify generation’ section, choose ‘Generation 2’ and hit ‘Next’.
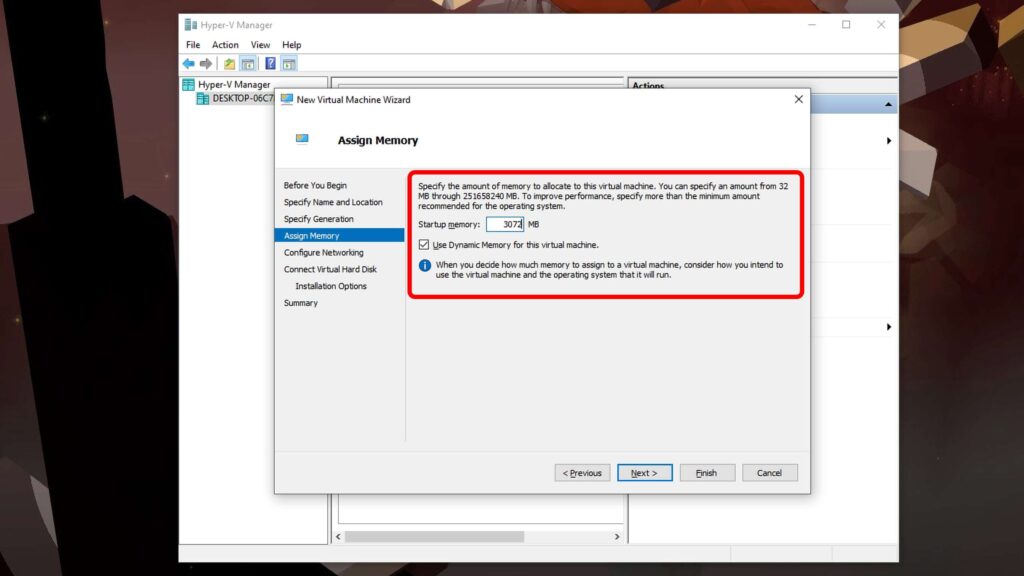
Ok, it’s time for a vital part. Now, you have to decide how much RAM of your system you want to allocate to Windows 10X. Keep in mind, the more RAM you allocate, the much smoother and faster experience you would get but do not allocate too much RAM to the Hyper-V. For example, if your system has 16GB RAM (Memory) and you have allocated 8GB to the Hyper-V then your total system may slow down when the Hyper-V will be running. So, it is better to allocate 3GB or a maximum of 4GB to the Hyper-V if you have 8GB or 16B RAM. In our case, our system has 32GB of RAM so, there is nothing to complain about allocating 8GB to the Hyper-V. Anyway, after assigning your choice, hit ‘Next’.
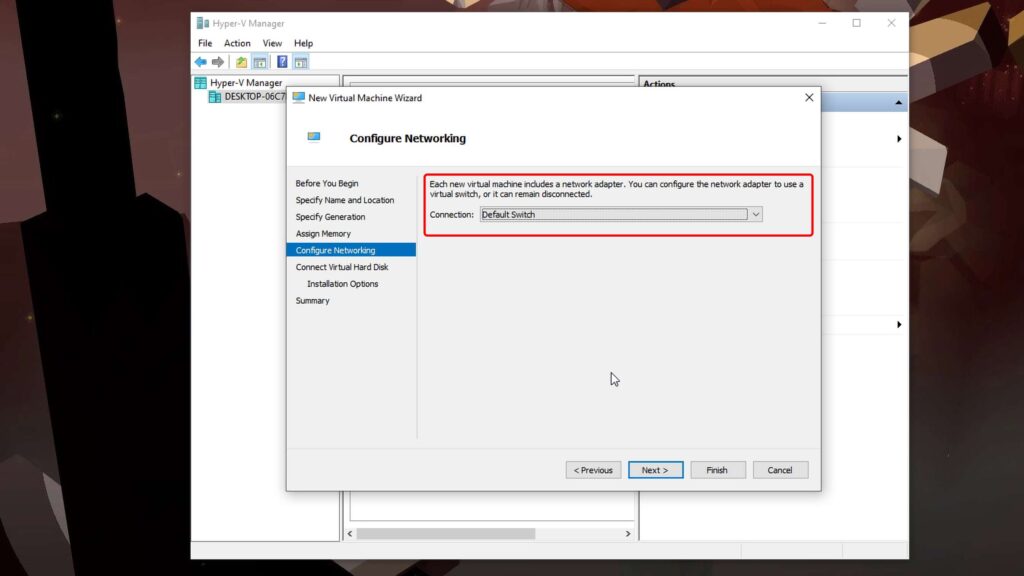
On the ‘Configure networking’ page, choose ‘Default Switch’ from the drop-down menu and hit ‘Next’.
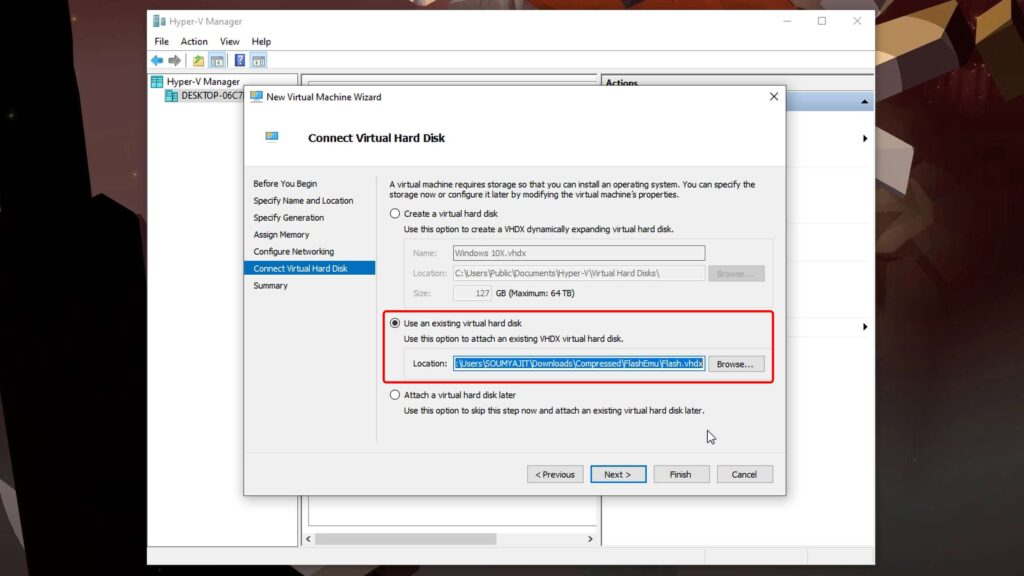
The last step and an important step, click on ‘Use an existing virtual hard disk’ and select the ‘Flash.vhdx’ file by clicking on the ‘Browse’ button. Please do not click on ‘Create a Virtual Hard Disk’. Click on ‘Next’.
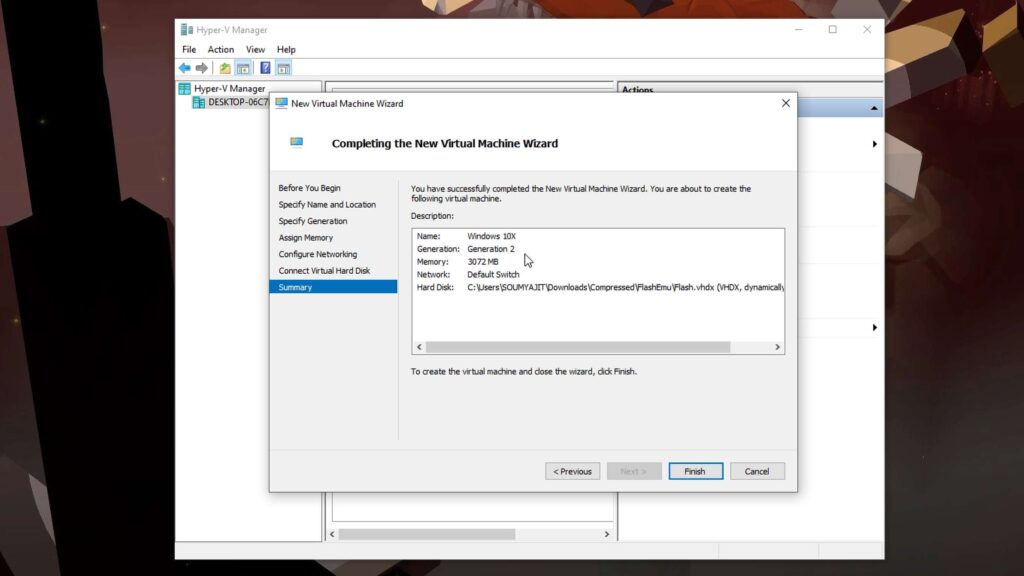
Now on the ‘Summary’ section, verify everything that you have set and click on ‘Finish’.
That’s it. You have successfully installed Windows 10X on your PC.
Install OS on the Hyper-V using ISO file
The whole process is almost the same as before, there are two things that should be set up differently.
First of all, ‘Name’ you have to put the name of the Virtual Machine according to the operating system you are installing.
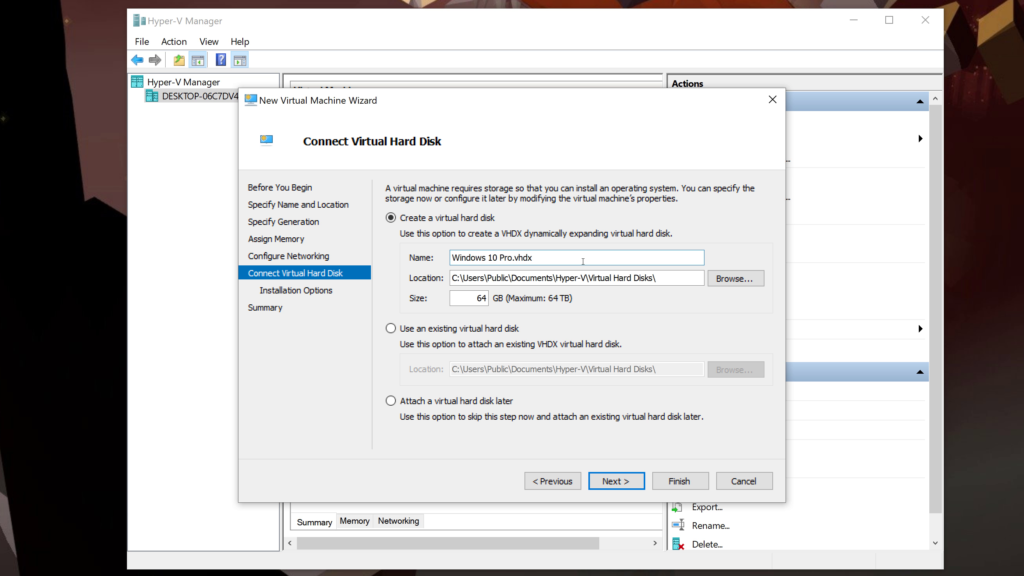
Secondly, on the ‘Connect Virtual Hard Disk’ section you have to choose ‘Create a Virtual Hard Disk’ instead of ‘Use an existing virtual hard disk’. Here you can rename the ‘VHDX’ file and also choose the location where the ‘VHDX’ fill will create and also mention the hard disk space you want to allocate for that OS you’re going to install. Click on ‘Next’.
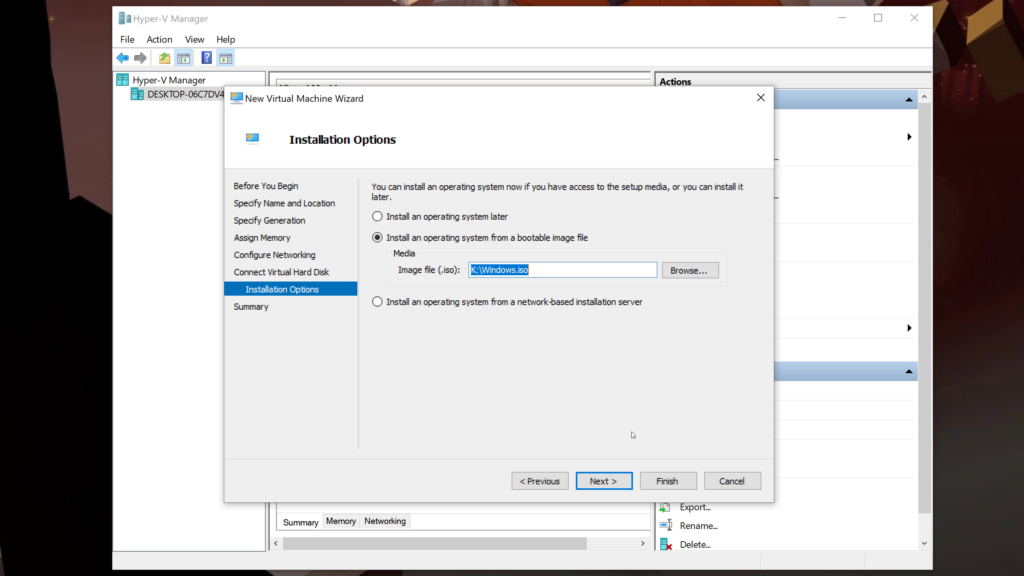
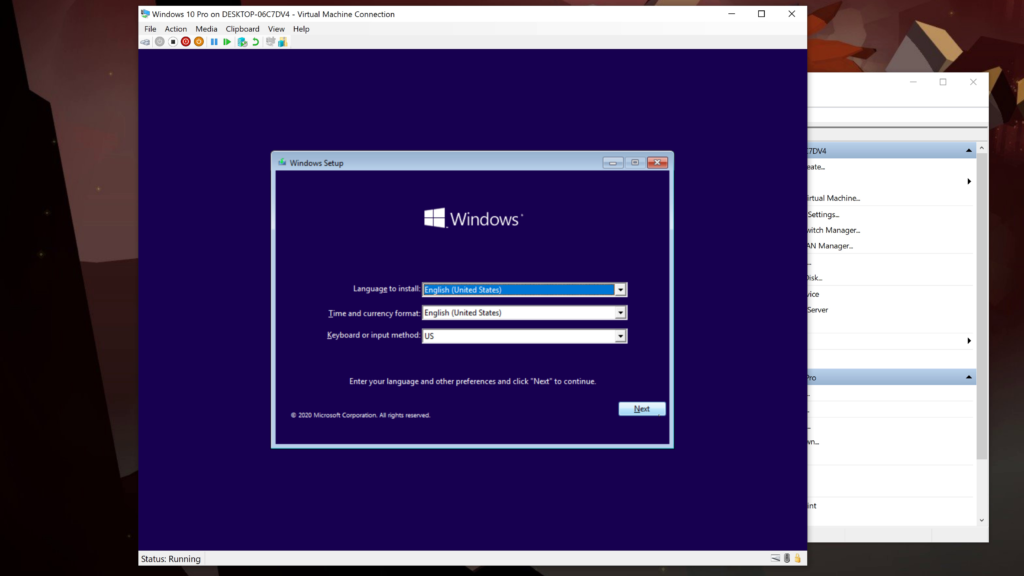
On this new section named ‘Installation Options’ select ‘Install an operating system from a bootable image file’, click on ‘Browse’, and choose the ‘iso’ file. We are going to use the iso file of Windows 10 for the demonstration purpose. Click on ‘Next’.
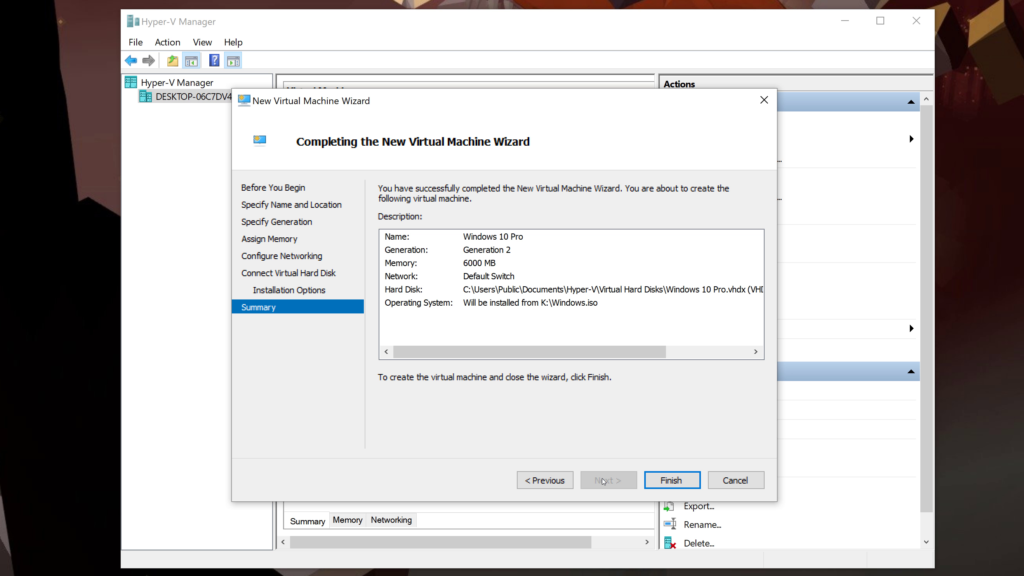
Now on the ‘Summary’ section, verify everything that you have set and click on ‘Finish’.
Run the Operating System on Hyper-V
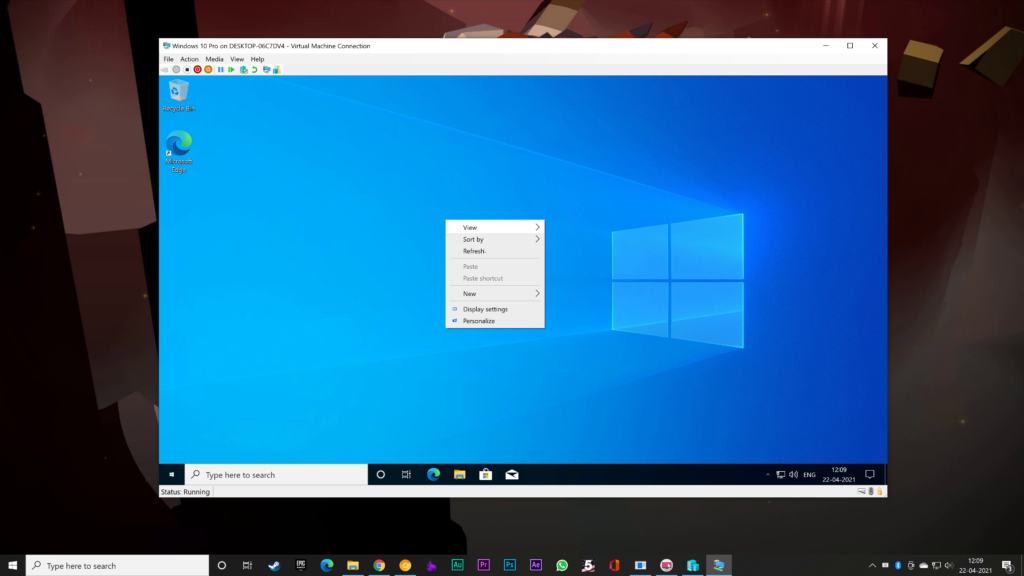
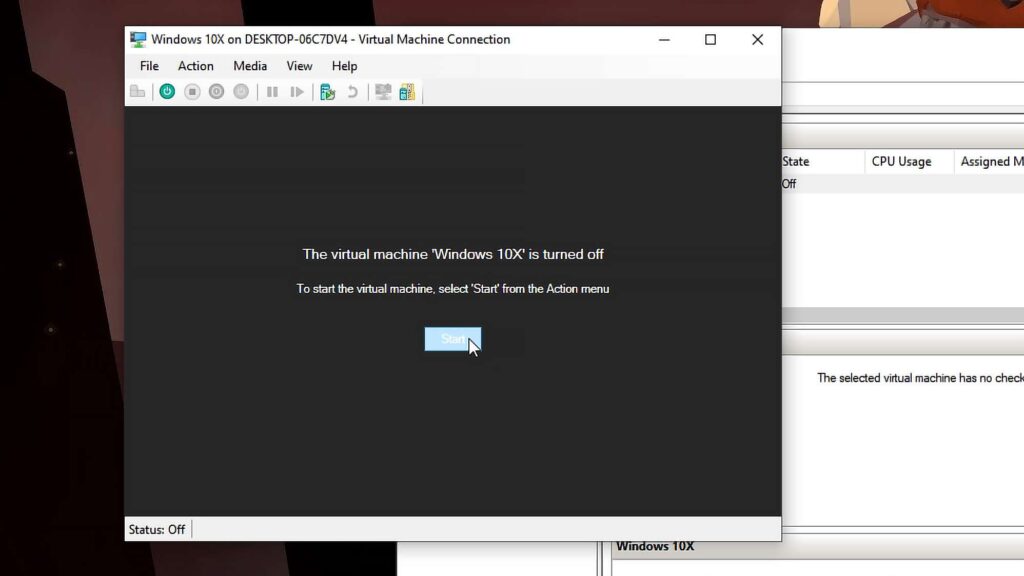
Right-click on the virtual machine. In our case, we have named it ‘Windows 10X’ so just right-click on it and choose ‘Connect’.

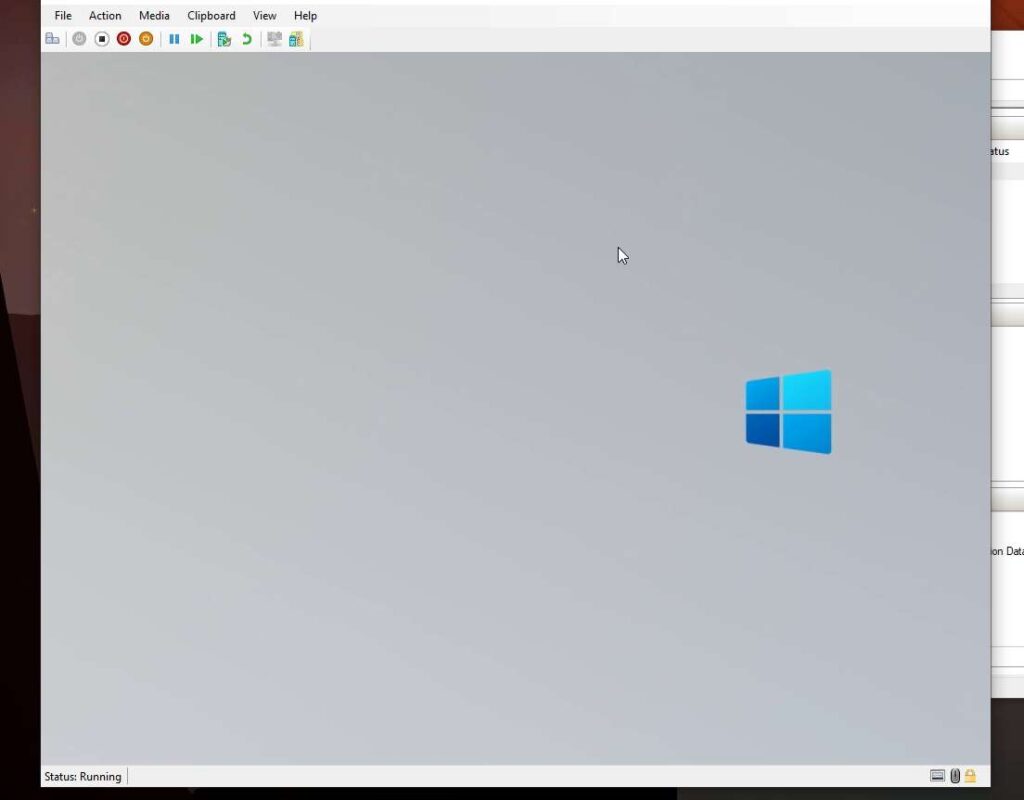
After that, click on ‘Start’ and the ‘Hyper-V’ will start the virtual machine directly from the VHDX file. On the first run, it will take some time to process all the files and information.
Then you will be greeted with a boot animation of the OS you have just installed. For our case, we have installed Windows 10X.
Now, just log in into the OS and you’re good to go.
If you have used the ‘iso’ file then the process will be a bit lengthy. Just like before, turn on the virtual machine by clicking on the button ‘Connect’. Now the operating system actually is starting to install on the virtual machine. As we have used Windows 10’s ‘iso’ file then, now we have to follow all the steps that we normally follow to install Windows 10 on an actual PC. After doing all that steps, the ‘Desktop’ of Windows 10 on the virtual machine will be available.
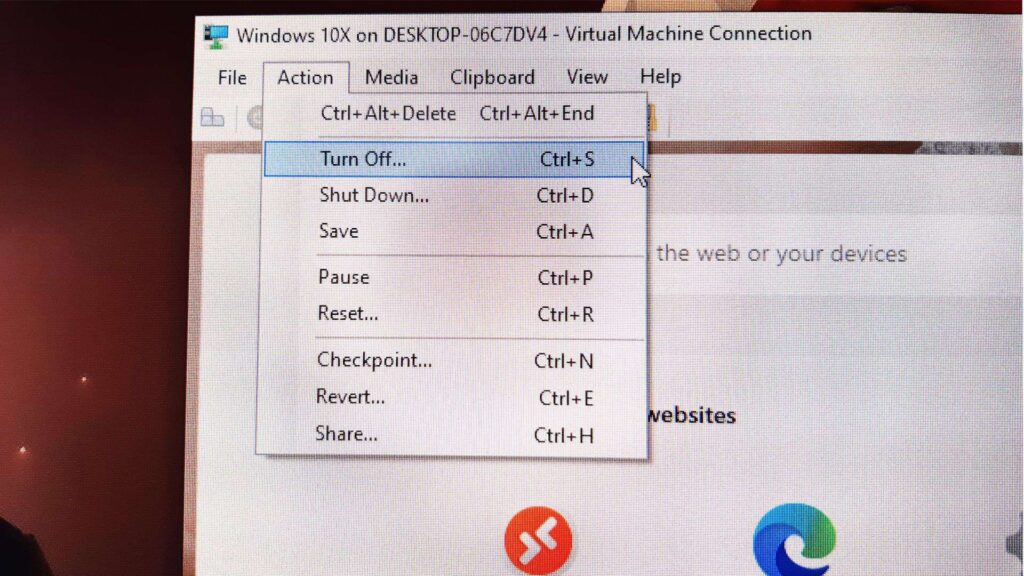
If you want to stop the virtual machine then click on ‘Action’ at the top-row menu and choose ‘Turn off’.
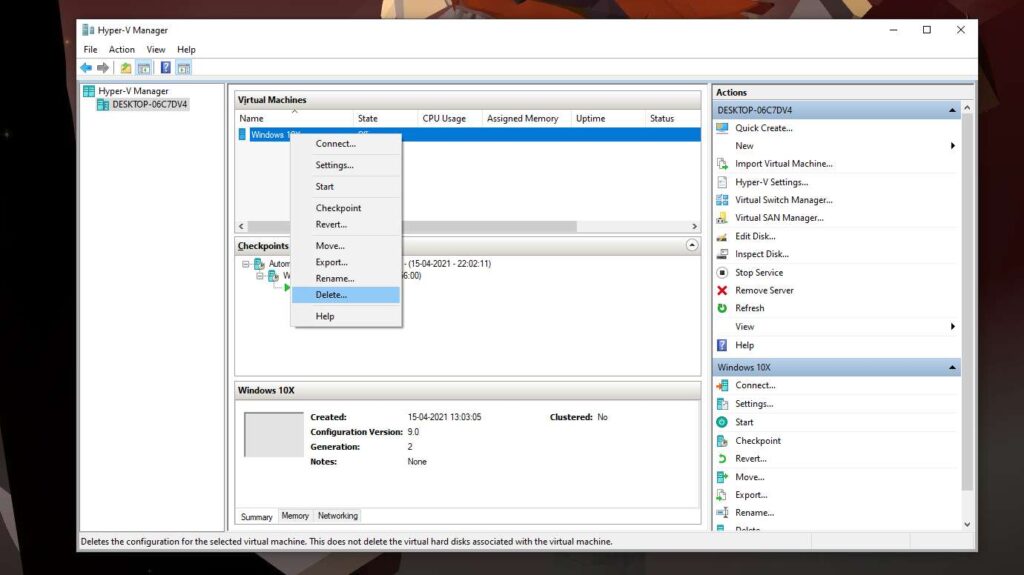
Want to delete the OS? Don’t worry, right-click on the virtual machine you have created and choose ‘Delete’. That’s it.
Therefore, we hope you have really understood how to set up Hyper-V & create virtual machines on Windows 10. We can also hope that this article really has helped you. If it really so then don’t hesitate to express your valuable thoughts in the comment section below. Thanks for visiting & appreciating our work.