Finally, the wait is over. Microsoft finally announced an in-built screen recorder in Windows 11. Users now no longer need to rely on Windows Game Bar, NVIDIA Geforce Experience, or similar third-party software. However, the screen recording feature of Windows 11 is not currently in the stable build. The new update is currently for developer channel users but there is a trick to get screen recording in the regular snipping tool of the stable version of Windows 11. So without further ado let’s take a screen recording in the snipping tool on Windows 11.
Windows 11 Screen Recording Without any Software
With the recent introduction of the screen recording software in the Windows 11 snipping tool now screen recording will become very easy to perform, even if we could record a specific area of the screen instead of recording the full screen. As I have mentioned, this new snipping tool is only in Windows 11 dev channel but using the MSIXBundle package we can access this feature in the stable version too. If you don’t want to perform such modification then you could wait until the snipping tool update is delivered in Windows 11 stable build.
Also Read: 8 Signs That Your RAM is Going to Fail
Known Issues With New Snipping Tool Screen Recording feature in Windows 11
The new snipping tool is just launched so it is just a barebone app. It is possible that there will be a lot of bugs but I have discovered quite a few on my own. One of the most annoying is, sometimes the Snipping tool refuses to start the recording. It just freezes and does nothing for a few minutes. When it is back to normal still there is no hope. We have to close the snipping tool and re-open the app to solve issues. Even this trick also not function all the time. Often we have to restart Windows to fix the problem.
In terms of recording capability yes it supports the common standard MP4 (H.264) format but is only limited to 30FPS which is not acceptable for a few people but for me it is okay. My most of the videos uploaded on YouTube are 1080P 24FPS, so screen recording in 30FPS is not a problem for me.

Apart from that, there is no option to turn on /off the audio and video sources such as external mic, device audio, webcam, etc. We though can consider that because this is in just its beginning stage that’s why the new snipping tool with screen recording feature is in Windows 11 dev channel. When it is finished or a little bit polished so that a normal user can use it without any hesitation then it will be in Windows 11 stable build.
How to Install New Snipping Tool In Stable Version Of Windows 11
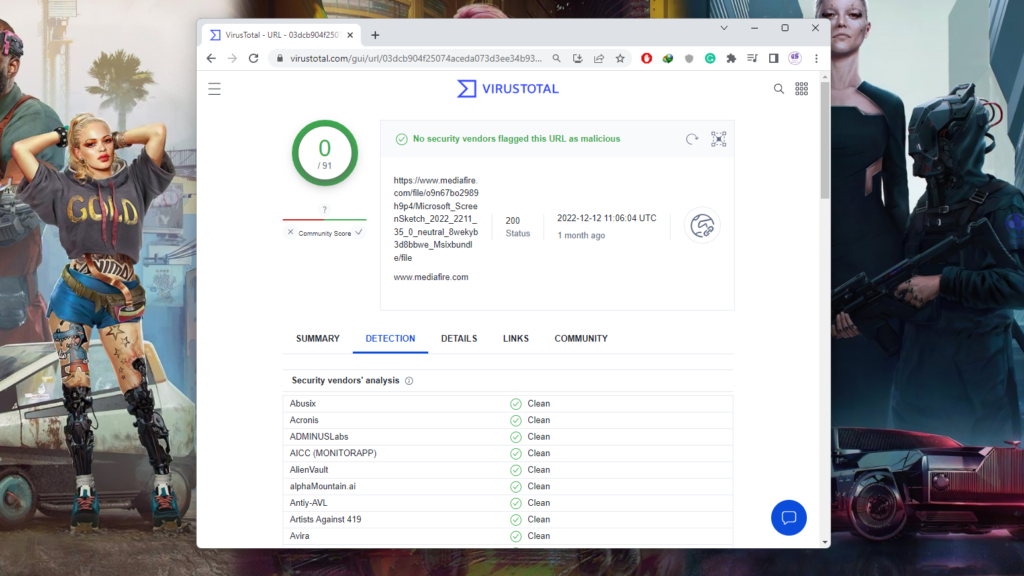
To install the new Snipping tool you have to update the old version. The new version of the Snipping tool can be downloaded from this link. As I have tested the file as well as the link in VirusTotal and according to scans it is completely safe and secure. So, you can download it.
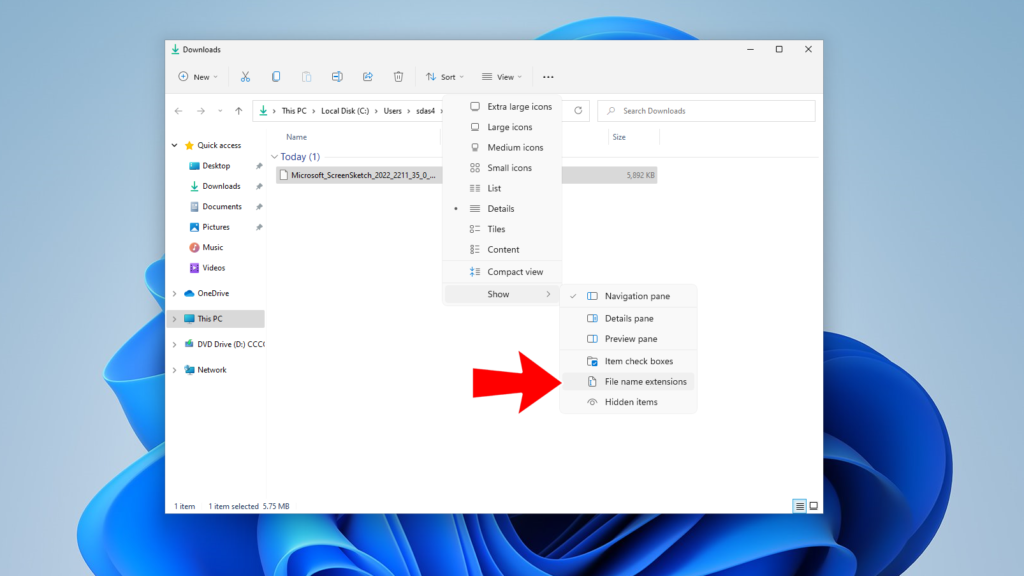
With the completion of the download, you need to rename the extension. So you first configure Windows to view the extensions. Which you could perform by clicking on View -> Show -> File name extensions option in the top menu bar.
Now rename the file with the .msixbundle extension. As soon as you change the extensi on immediately the icon of the package will change. As shown in the image below.

While this is done you can double-click on the download file and install it. When the installer appears, it detects that your system has the older version of the Snipping tool and asks for an update.
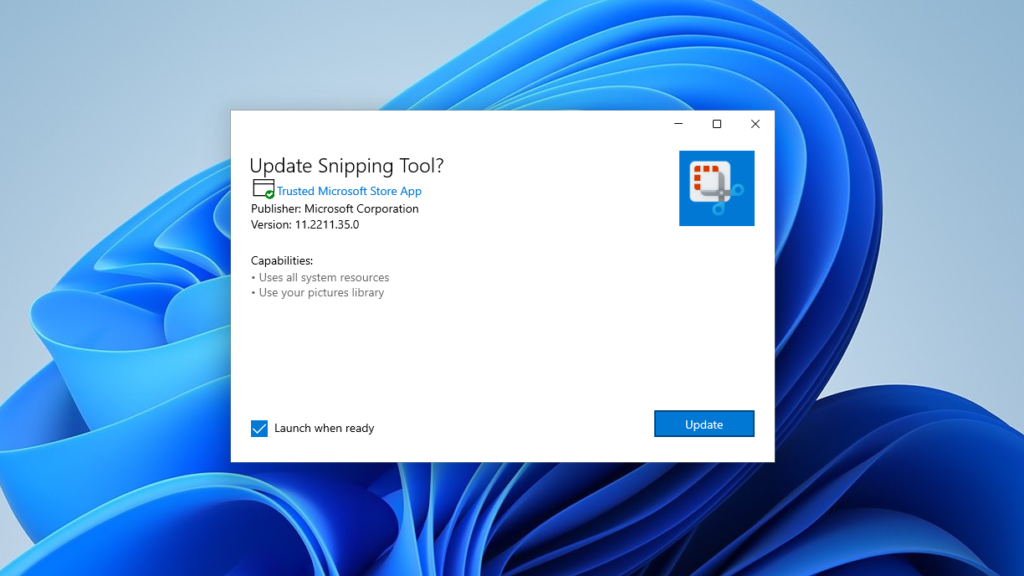
Just click on ‘Update’. Which starts the update process. With this update Snipping Tool with screen recording functionality will be installed on your Windows 11 PC.

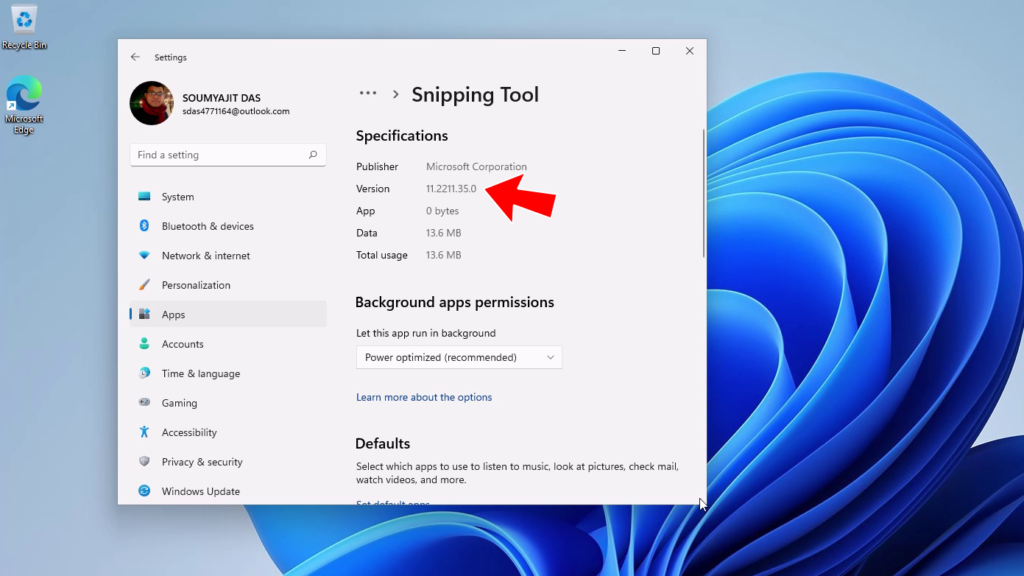
However to verify whether the new Snipping tool with screen recording functionality has been properly installed or not you could note the previous version before installing the new Snipping tool and after installing the new Snipping tool check the version once again. The new Snipping tool version should be at least 11.2211.35.0 or upper.
That’s it. When you are planning to record the screen you just prepare the app which you want to record and open the new Snipping tool. To record the screen on Windows 11 using the Snipping tool, switch to the “Record” option and then click on the “New” button.

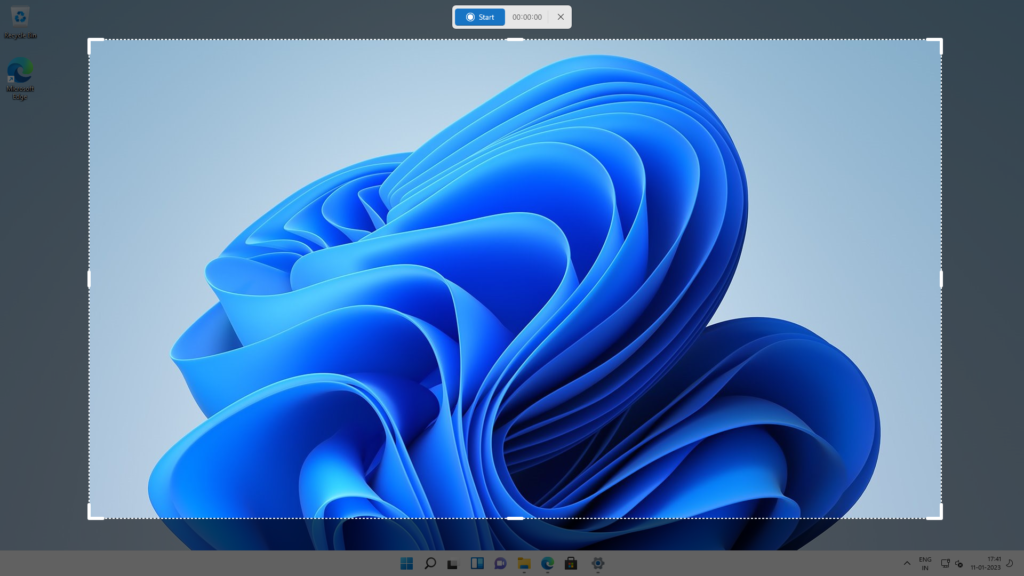
Now go ahead and select the area that you want to record. Click on “Start” to begin the screen recording. This will open a small bar on top of the screen.
When everything is recorded click on ‘Stop’ button from the top sidebar as shown in the image below. Even if you aren’t satisfied with the recorded content you could directly discard the recording by clicking on the small trash icon near the ‘Stop’ button.

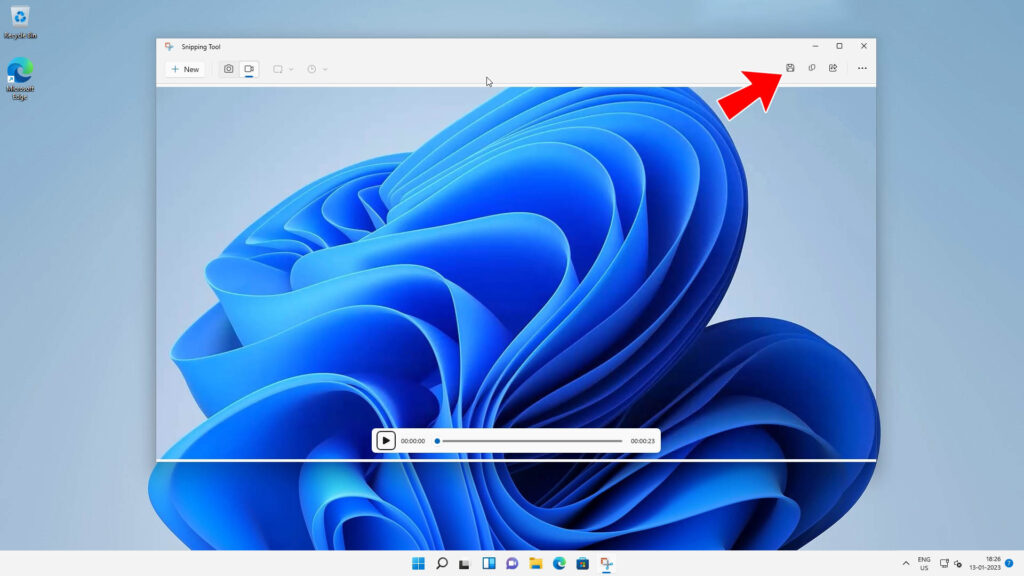
The Snipping Tool will now open up. You might see an error ‘invalid file path’ just ignore it and click on the “Save” button at the top right to store the screen recording.
Now the recording is ready to use. If you’re not satisfied with the new Snipping tool with screen recording functionality you can even revert back to the older version.
Uninstall the Latest Snipping Tool
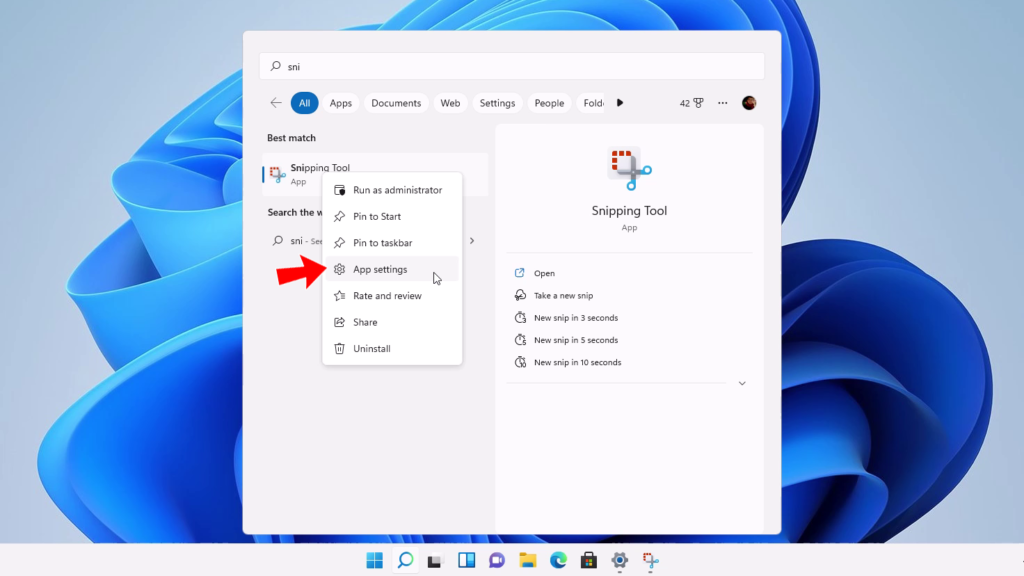
Open the Start Menu and right-click on “Snipping Tool”. Select “App settings”.
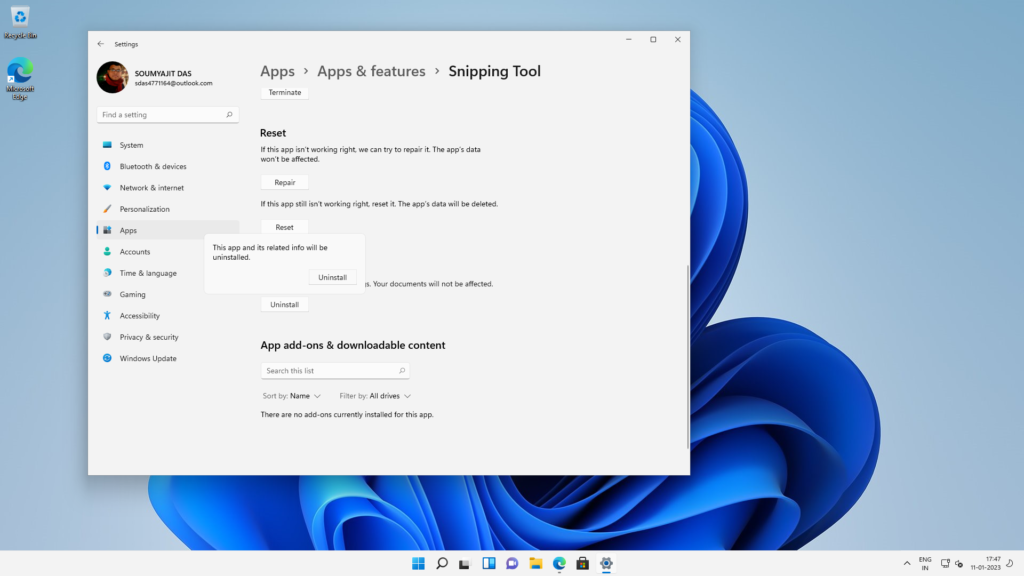
Here, scroll down and click on “Uninstall“. This will remove the Snipping Tool from your system.
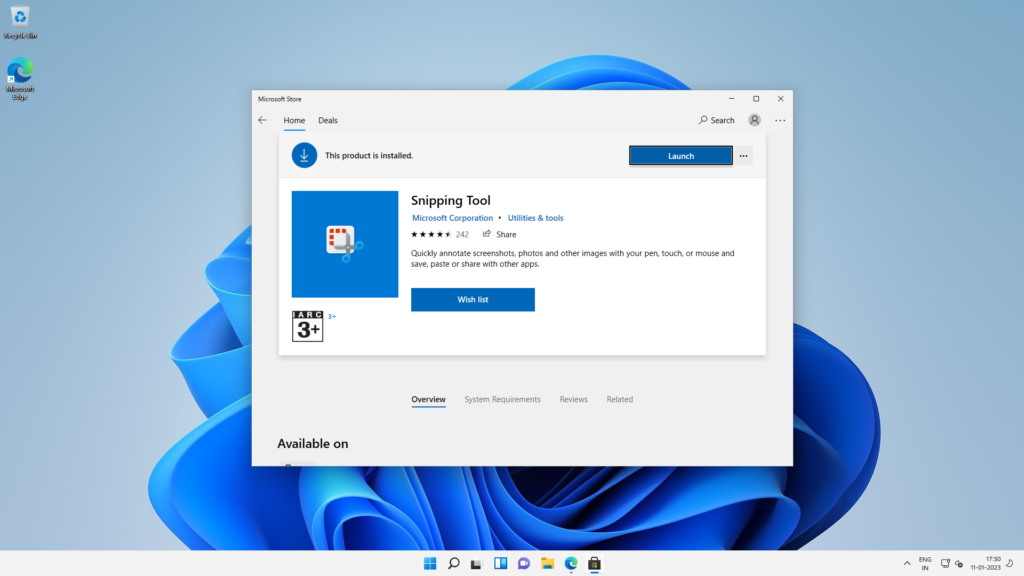
To install the older version open the Microsoft Store and search for “Snipping Tool” and install it. Obviously, this Snipping tool does not offer screen recording functionality.
Also Read: Wireless Mouse Not Working! How to Test?
Windows Built-In Screen Recording: Dreams Come True
So, finally, Microsoft heard us. The screen recording functionality is finally on the way to the stable version of Windows 11. Do you use the unpolished version? If yes then you could report issues and problems to the Microsoft community to improve this tool further. Hope you guys have enjoyed this article and learned something new. If so then express your thoughts in the comments below thanks for visiting.