
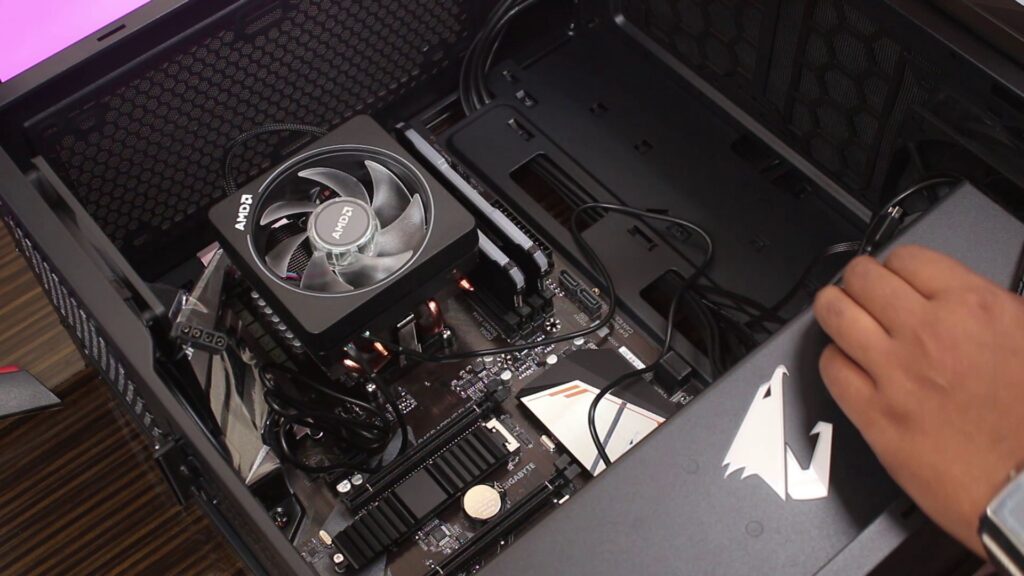
So, let’s face it. You’re building a powerful PC. You have bought a high-end CPU, Graphics Card, Motherboard, and high-frequency RAM with the lowest possible latency. Do you know your RAM isn’t actually running at its advertised timings and frequency? RAMs always run at a standard frequency unless you manually set their timings or enable XMP.
Definitely, XMP is not for everyone. Most of the low-cost RAM doesn’t offer such technology because they’re designed to run at their default but if you’ve paid money for higher frequency then definitely, it has the XMP. Now the question is, what is XMP? & most importantly, how to enable XMP?
Don’t Miss: Hyper-V On Windows 10 Home! Yes, It’s Possible!!
What Is Intel XMP?
Let’s start with some basics about XMP. Basically, every RAM manufacturer has to follow a standard set by JEDEC, the Joint Electron Device Engineering Council. They actually define the highest frequency a RAM should work. Manufacturers can go beyond it but by default, their RAM should follow the standard. So, if you buy a RAM advertised with specific timings which no doubt make it faster but inserting it into the Gamers and enthusiast specify motherboards doesn’t immediately run at those advertised speeds.
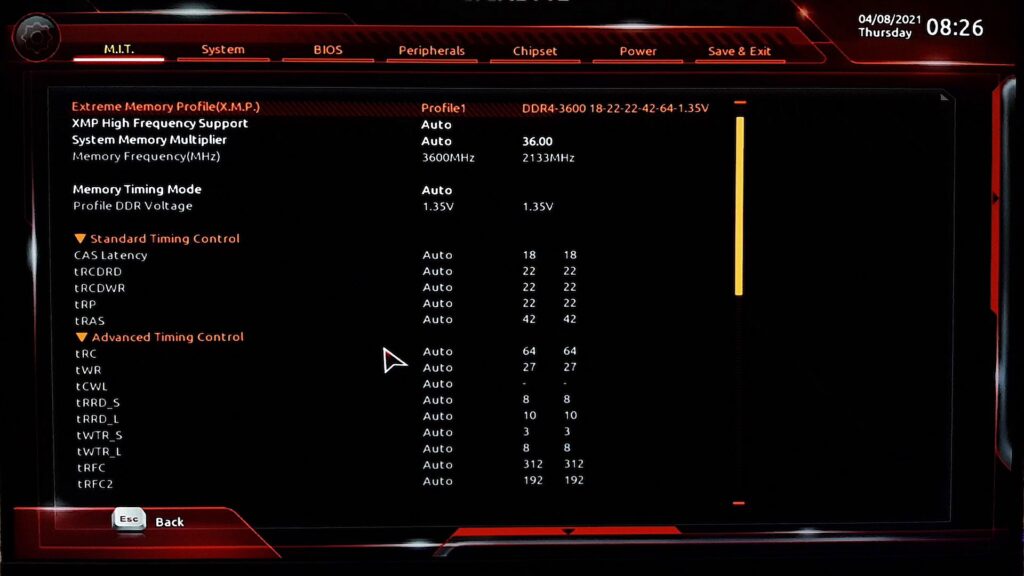
Here the good news is, you don’t need to set the frequency and timings and voltages value by value to achieve stability instead manufacturers have done the job for you. They test the RAM, find its sweet spot and store those values in a small memory chip. They create one or two Intel “Extreme Memory Profiles” on that memory. Your motherboard’s BIOS then reads the memory, finds the profiles and gives you the option to choose one. You have to choose one of them and your BIOS automatically configures the optimal timing, voltage & frequency chosen by your RAM’s manufacturer. Definitely, it is the advertised timings you have paid for.
How to Enable XMP?
Enabling XMP isn’t a rocket science rather it’s pretty simple, and nothing much to do. First, you need to go to your computer’s BIOS. Different computers possess different rules. But mostly, you have to rapidly hit either “Delete” or “Esc” or “F2 or “F10” to head into BIOS. The key mostly is displayed on your computer’s screen during the boot-up process where the motherboard manufacturer logo appears. If you’re not sure what the appropriate key for your computer, check your computer’s or your motherboard’s manual.

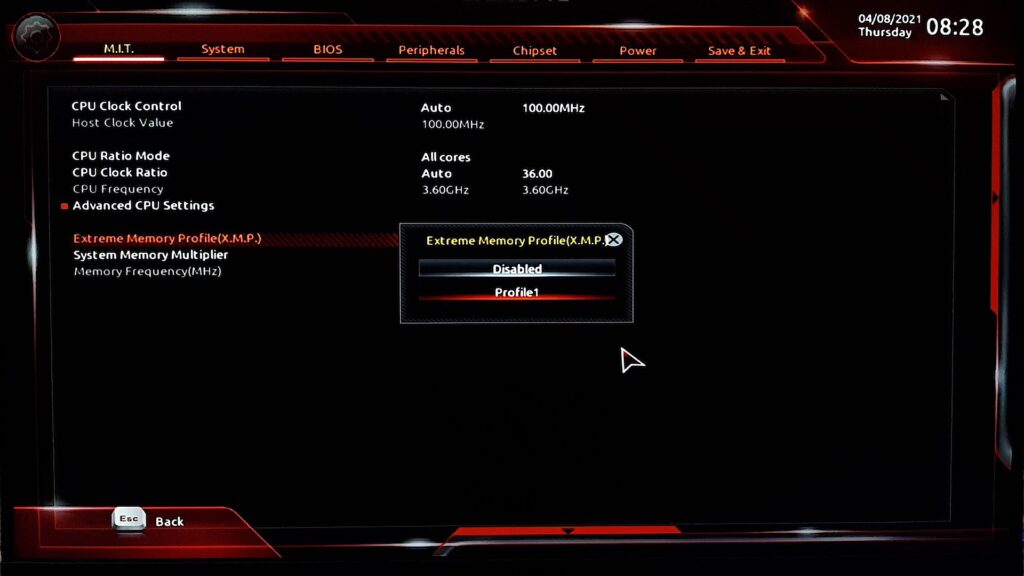
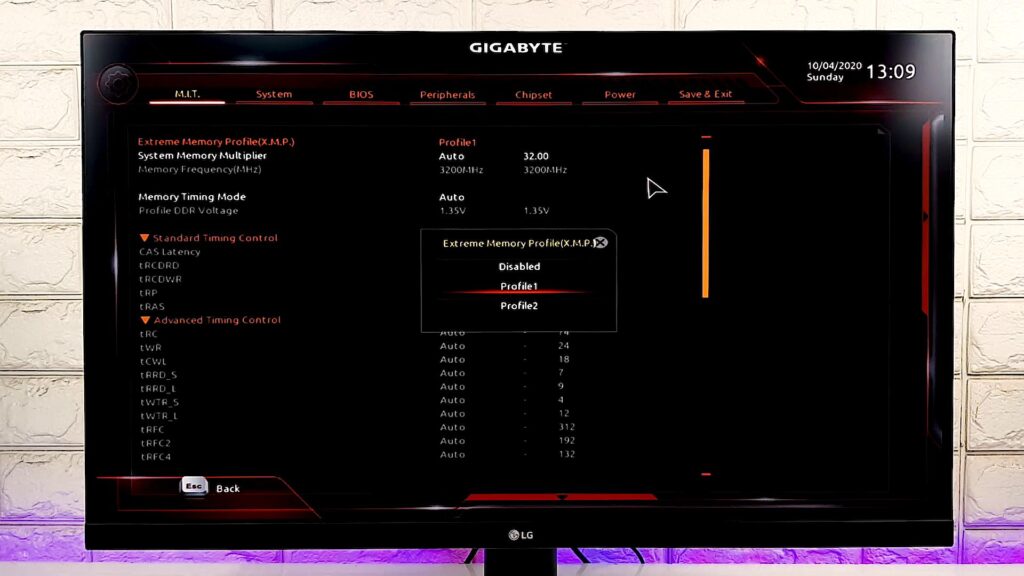
Now, find an option called “XMP”. There is no standard for the location of this option but in my case, (I’m using Gigabyte Aorus b450 elite v2 motherboard) it’s in the “Advanced Frequency Settings”. However, sometimes, it’s on the main screen and sometimes, it can be in an “overclocking” options section, although that’s not technically overclocking.
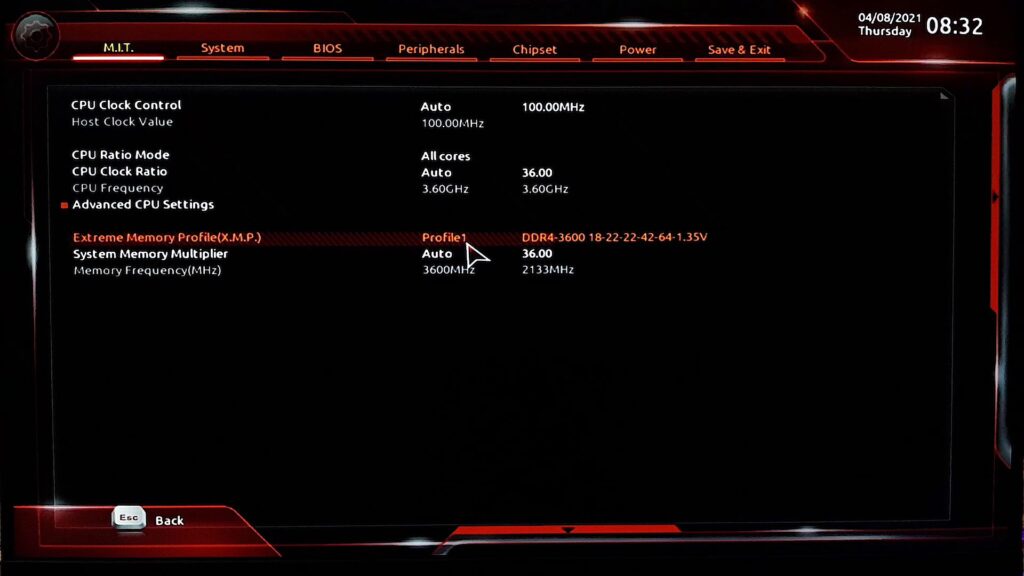
Now what? Just activate the XMP, choose the profile if you’ve multiple ones (often just a single XMP profile is available) and that’s it. Sometimes, you may just have one option to “Enable” or “Disable” depending upon the motherboard manufacturer.
Should Read: 2.4 GHz Vs Bluetooth Keyboard & Mouse: Which One Should You Buy?
Which Memory Profile to Choose?
As I have mentioned earlier, sometimes manufacturers provide two memory profiles (“Profile 1” and “Profile 2”) and mostly they are quite similar then which one to choose? The first profile contains the rated speed advertised on the box and it is the most stable setting. The second profile contains more extreme settings that offer a much higher level of performance but sometimes it is not as stable as the first one.
Note: In the case of AMD, you may find DOCP instead of XMP. Basically, Intel developed XMP, DOCP was developed by AMD.
How to Know Your RAM supports XMP or Not?
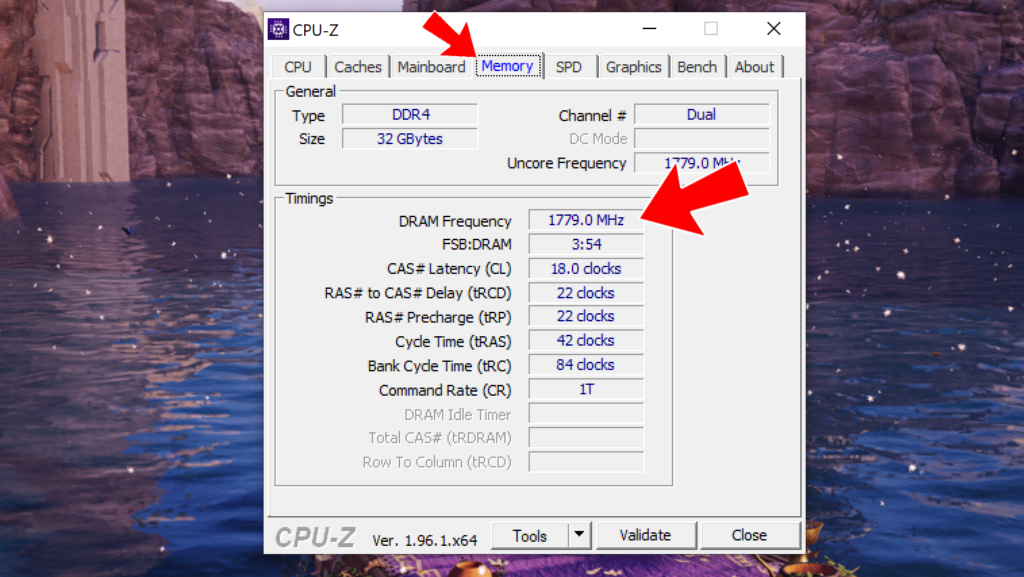
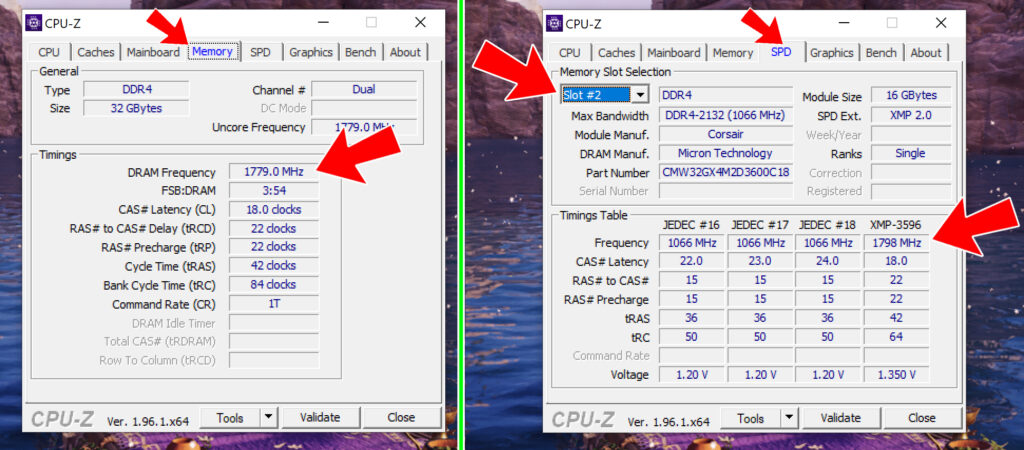
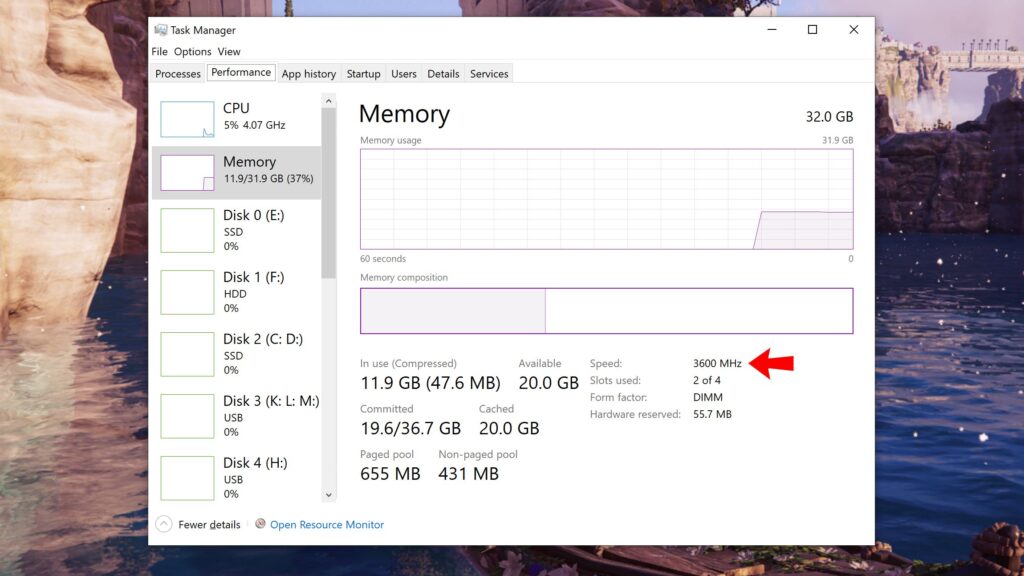
Simple, Download an application called CPU-Z. Yeah! You can use it on your operating system. Click over to the Memory tab and you’ll see what timings your RAM is configured to run at, as shown in the picture below.
Now, go to the SPD tab. Here, you will find the Part Number and a Timings Table section. (If you only have two of your four DIMM slots populated, or one of your two DIMM slots used then you will have to switch the slot# combo-box to a populated slot, or else you won’t see any information).
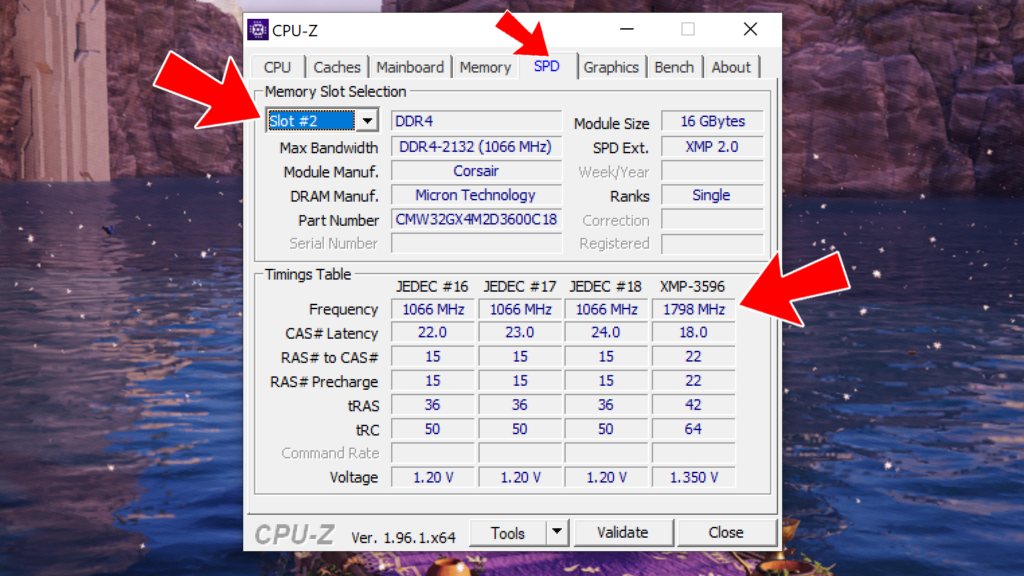
Now find if there is any XMP section shown or not on the “Timing Table”. If it does then there should be a value written next to it. It is the frequency that you can set by enabling XMP. Now, compare this value with that frequency value that you have found on the “Memory” tab. If they match or close to each other then the XMP profile is already enabled. If not then go and enable it.
If you can’t find XMP on the “SPD” tab then probably your RAM doesn’t support XMP. Or maybe your motherboard doesn’t. You can try again after updating your motherboard’s BIOS.
Is XMP stable?
It depends on many outside factors. Take CPU clock as an example. If you overclock your CPU and combine it with XMP-enabled RAM then maybe your system can’t be stable anymore. Basically, RAM manufacturers first set the timings, voltage, and frequency of their product and thoroughly test it in an idle situation means no overclocking. So, without any CPU tinkering, XMP is completely safe. It is stable.
Therefore, this is the simple method of how to enable XMP to use your RAM at the advertised speed. Anyway, we hope that you have found this article really helpful. If so then don’t hesitate to express your valuable thoughts in the comment section down below. Thanks for visiting & appreciating our work.